In this blog post, we’ll guide you through the steps of constructing a homemade aeroponic cloner. An aeroponics cloner is a device that facilitates plant growth from cuttings from your favorite healthy plant by suspending the cutting’s roots in air and intermittently misting them with nutrient-rich water solution. It’s an ingenious way to cultivate plants as it allows for faster growth and higher yield.
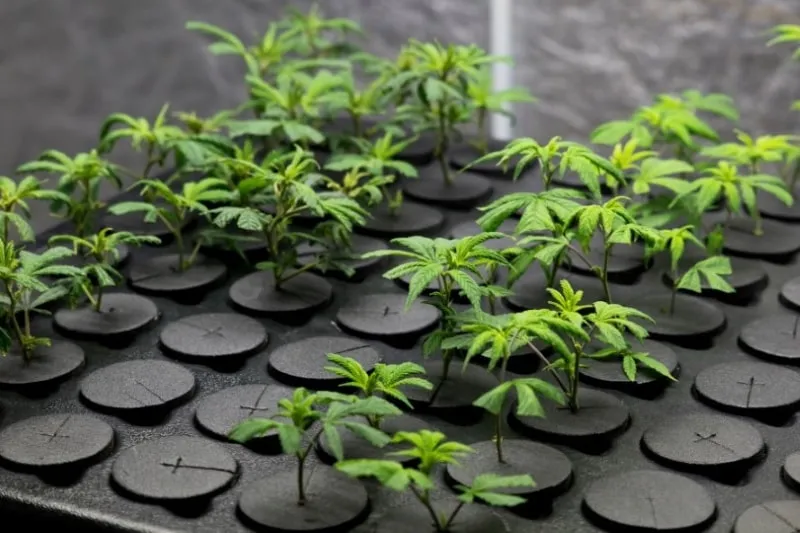
In the world of hydroponics, aeroponic cloning presents several benefits such as space efficiency, water conservation, and reduced disease transmission among plants – all while giving you full control over your garden’s environment. Creating a DIY aeroponics cloner not only saves money but also allows you to customize the system according to your specific needs and preferences. So why not roll up your sleeves and get started on building your very own aeroponic powerhouse using our comprehensive step-by-step tutorial?
- Components Needed for Your DIY Aeroponics Cloner
- Step-by-Step Construction Guide: Building Your DIY Aeroponics Cloner
- Choosing the Right Nutrient Solution for Aeroponic Cloning
- Maintaining Your DIY Aeroponics Cloner: Tips for Successful Plant Propagation
- Transplanting Clones from the Aeroponics Cloner to Growing Mediums
- FAQs
Components Needed for Your DIY Aeroponics Cloner
When you’re setting out to build your own DIY Aeroponics Cloner, understanding the key components and their functions is critical. Each piece of the puzzle serves a unique purpose that contributes to the overall success of your system. Here’s what you’ll need:
1. Reservoir: The reservoir forms the foundation of your aeroponic cloner. This water-holding tank stores nutrient-infused water that will be misted onto your plants’ roots. Acquiring a sturdy, non-transparent reservoir is crucial as it prevents algae growth and keeps light from reaching the roots.
2. Misting System: An essential component in your cloner is the misting system or spray manifold. It sprays fine droplets of nutrient solution directly onto plant roots suspended in air within your system. This high-oxygen moisture environment encourages rapid root development and faster plant growth.
3. Air Pump: Installing an air pump ensures that there is sufficient oxygen supply, which is vital for plant growth and health. It pushes pressurized air into your misting system, enabling continuous atomization of nutrients — something that plants need for optimal growth.
4. Net Pots: Often overlooked but integral to setting up an aeroponic cloner are net pots — small baskets with open-weave designs that house your plants while exposing their roots to necessary nutrients and oxygen.
5. Cycle Timer: Consistency matters in aeroponics; hence you’ll need a cycle timer to ensure regular intervals between misting sessions, preventing oversaturation or drying out of roots.
6. Hydroponic Nutrients: Hydroponic nutrients provide all essential mineral elements needed by plants in readily available form since soil isn’t present to slowly release those nutrients over time.
7. Spray Nozzles and Tubing/PVC Pipes: These tiny but crucial devices distribute nutrient solution from your reservoir, via tubing or pipes, into a fine mist, ensuring maximum nutrient uptake at the root zone.
Each element plays an important role in creating an efficient aeroponic cloning system. With careful planning and assembly, these components can work together harmoniously, fueling plant growth like never before.
Step-by-Step Construction Guide: Building Your DIY Aeroponics Cloner
Building your own DIY Aeroponics Cloner can be an invigorating project. This step-by-step guide will walk you through the process, ensuring you create a successful and functioning system. Let’s dive in!
Materials Needed
Here are the main materials you’ll need for this project:
- 1x Plastic storage bin (at least 14”x14”x12”)
- 1x Submersible water pump
- 2x PVC pipes (1/2” in diameter)
- Multiple net pots
- Neoprene collars to fit your net pots
- Dark plastic or paint to light-proof your cloner
- Flexible tubing (to fit water pump outlet)
- T-fitting for flexible tubing
- Misting nozzles
Now let’s get started with the assembly.
Assembly Steps
Step 1: Marking the Lid
The first step is marking the placement of your net pot holes on top of your container lid. For a typical aeroponic cloner setup, space each hole four inches apart from each other.
Step 2: Cutting Holes
Using a drill with a hole saw attachment that matches the size of your net pots, cut out holes where you have marked on the lid.
Step 3: Preparing PVC Pipes
Cut two lengths of PVC pipe so they run the length and width of your container. Drill small holes along these pipes every two inches to install misting nozzles.
Step 4: Installing Misting Nozzles
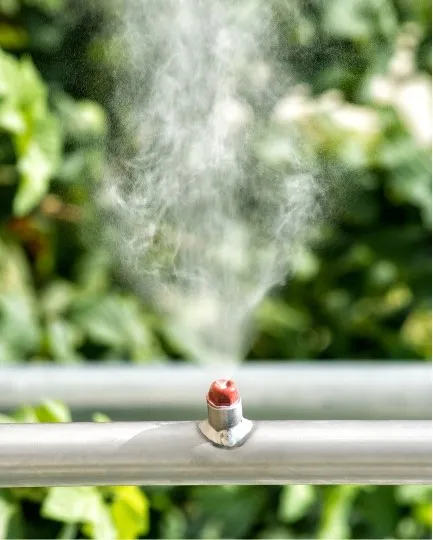
Securely screw misting nozzles into each drilled hole on both PVC pipes. Make sure they are tight enough to prevent leaks but not overly tight as it may damage the nozzle.
Step 5: Connecting Water Pump
Connect one end of the flexible tubing to the water pump’s outlet and attach a T-fitting at its other end. Connect each side of this T-fitting to either ends of your PVC piping system.
Step 6: Light Proofing
If not already dark, paint or tape all sides of your bin with dark plastic or paint to prevent light entry, which can lead to algae growth.
Step 7: Final Setup
Place pump inside bin, connect electricity source safely away from water sources and insert PVC pipes into place over it. Fill basin with nutrient-rich water until just beneath bottom-most misters then replace lid. Insert neoprene collars into lid holes and place plant cuttings inside these collars.
Congratulations! Your DIY Aeroponics Cloner is now ready for action!
Safety Precautions and Considerations during Assembly
While creating this cloner system, keep these safety tips in mind:
- Always use waterproof electrical connections
- Make sure all wiring is kept clear from any standing water.
- Exercise caution when working with tools like saws or drills.
- Wear safety glasses when cutting or drilling through material.
Related: Building your own cloner is not for everyone. If you prefer the convenience of a tried and tested solution, check out our buyer’s guide on finding the best aeroponic cloner machine.
Choosing the Right Nutrient Solution for Aeroponic Cloning
When it comes to aeroponic cloning, selecting an appropriate nutrient-rich solution is a step you can’t afford to overlook. This decision plays a pivotal role in facilitating optimal plant growth and development. Unlike traditional gardening where soil provides essential elements, aeroponics relies heavily on nutrient solutions to deliver these vital components directly to the plant roots. Remember, your plants are totally dependent on what you feed them!
Now let’s dive into different types of nutrient solutions available in the market.
- Macro Nutrient Solutions: These are primarily composed of Nitrogen (N), Phosphorus (P), and Potassium (K) – often abbreviated as NPK. They’re fundamental for all stages of plant growth.
- Micro Nutrient Solutions: These provide elements like Iron, Manganese, Zinc, Boron, Molybdenum, and Copper. Though needed in smaller amounts, these nutrients are equally important for wholesome plant health.
- pH Balanced Nutrient Solutions: Maintaining the correct pH level in your system is crucial as it affects nutrient absorption by plants. Some solutions come pre-balanced making it easier on the grower!
While all this might seem overwhelming at first glance, don’t fret! Here are some practical guidelines that will help you choose the most suitable option based on your specific needs:
- Know Your Plants: Different plants have different nutritional requirements at various stages of their life cycles. For instance, leafy greens may require higher Nitrogen while fruiting or flowering plants may need more Phosphorus.
- Match The Growth Stage: Young clones need a gentle start. Opt for lighter strength nutrient solutions initially and gradually transition to stronger ones as they mature.
- Quality Over Price: Don’t compromise quality for cost savings when it comes to nutrient solutions. The health and yield of your plants will justify investing in high-quality nutrients.
- Stick To The Instructions: Use the nutrient solution as per manufacturer’s instructions for best results.
Maintaining Your DIY Aeroponics Cloner: Tips for Successful Plant Propagation
Maintaining your do-it-yourself Aeroponics cloner is vital to ensuring reliable and effective plant propagation. Here are the essential tasks and useful tips for a successful maintenance routine.
Essential Maintenance Tasks
- System Check: Regularly inspect your aeroponics system for leaks, clogs, or malfunctioning spray nozzles. These could result in uneven nutrient delivery and affect plant growth. Replace any broken parts immediately to ensure the system runs smoothly.
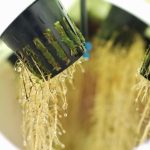
- Root Health Monitoring: Keep an eye on root health. Healthy roots should appear white with numerous hair-like structures. Brownish or slimy roots may indicate a problem such as disease or nutrient deficiency.
- Water-Nutrient Solution Change: Avoid letting your water-nutrient solution sit too long in the reservoir, as it may encourage algae growth and bacterial buildup. Aim to change it every two weeks.
Cleaning & Sterilization
To prevent contamination which could harm your plants:
- Regular System Cleansing: After every growing cycle, empty the entire system of any leftover solution, then cleanse with hot water.
- Disinfection: Use hydrogen peroxide (around 3% concentration) or bleach solution (1 part bleach to 9 parts water). Soak all components (pipes, reservoirs, misters) overnight then rinse thoroughly. This destroys any microbes that might have survived initial cleansing.
Maintaining the pH level and concentration levels of the nutrient solution is very important. You should keep an eye out for any signs of distress among the clones and immediately work to rectify any issues. We have a comprehensive guide on all the possible aeroponic cloning problems you can encounter and how to prevent and treat them.
Transplanting Clones from the Aeroponics Cloner to Growing Mediums
After you’ve successfully developed roots in your aeroponics cloner, it’s time for the next phase – transplanting these clones into a proper growing medium. This process might seem daunting at first but with some careful planning, good technique, and nurturing post-transplant care, you can help ensure your plants grow strong and healthy.
Step-by-step Instructions for Transplanting
- Prepare Your Growing Medium: First things first – prepare the new home for your clones. If you’re using soil as your growing medium, make sure it’s well-aerated and nutrient-rich. For hydroponics mediums, make sure they are appropriately conditioned according to their specific needs.
- Gently Remove the Clone: When your clones have developed a robust root system (usually visible under your cloner), they’re ready to be moved. Handle them gently to avoid any damage to the root system.
- Dig a Hole in Your Medium: Create an opening in your growing medium that’s large enough to accommodate the clone’s root system without cramping or bending it.
- Place the Clone into The Hole: Gently place your clone into the hole you’ve made in your growing medium ensuring that roots completely fit within without being overly packed or stretched out.
- Cover Up The Root System: Once perfectly positioned, carefully cover up the clone’s root system with additional soil or growing medium until only the stem and leaves remain exposed above ground level.
- Water Immediately: After planting each clone, water immediately but cautiously; drenching could cause shock to sensitive roots whereas under-watering might leave them thirsty after their big move.
Post-Transplant Care Tips and Best Practices
Ensuring successful plant development doesn’t stop at transplantation. Here’s what you need to focus on once those roots are firmly nestled in their new homes:
- Regular Check-ins: Monitor both above-ground growth and root development closely during early days post-transplantation.
- Optimal Watering Guidelines: Don’t overwater! Too much water can lead to root rot or fungal disease. Ensure that watering keeps pace with plant size & environmental conditions—it will increase as both grow.
- Temperature Control: Keep temperature levels consistent—extreme fluctuations can stress young plants out significantly.
- Nutrient Management: Gradually introduce nutrients if using soilless media like hydroponics systems or coco coir—too much too soon can damage tender roots.
- Light Management: Provide abundant light but make adjustments based on plant response—every plant species has its own ideal light specification so research yours thoroughly!
Remember that patience is key when caring for newly transplanted clones! It may take some time before tangible growth is seen, but steady vigilance combined with informed practices will greatly improve chances of success. If you want to continue using aeroponics to grow your plants, here’s how you can build a simple aeroponic system or even build an aeroponic tower.
Troubleshooting Common Issues with DIY Aeroponics Cloners
Life is never without challenges, and the journey of building and operating your DIY aeroponics cloner comes with its unique set of issues. But don’t let this deter you! With a bit of knowledge and some practical solutions, you can tackle these speed bumps head-on. Let’s dive into the common problems that may arise and how to resolve them.
Problem #1: Clogged Misters
Clogged misters can be quite a nuisance when you’re trying to ensure your plants receive the best care possible. This issue is often caused by mineral buildup or debris in the water supply.
- Solution: Regular maintenance is key to prevent clogging. Clean your misters regularly using a solution of vinegar and water to dissolve any mineral deposits. For more stubborn clogs, consider disassembling the mister for thorough cleaning. Always ensure that your water supply is clean and free from debris to avoid recurrent issues.
Problem #2: Inadequate Root Growth
Inadequate root growth could be due to various factors – insufficient nutrients, inadequate lighting, suboptimal temperature conditions, or improper misting schedule.
- Solution: Firstly, ensure that your nutrient solution is appropriately balanced for your specific plants’ needs. Next, verify that your system provides ample light (preferably full-spectrum) and maintains an optimal temperature range (generally 68-72°F). Adjust your misting schedule as necessary; roots should be moist but not drenched.
Problem #3: Bacterial/Fungal Infections
These can quickly ruin a healthy crop if not addressed promptly. They usually occur due to unsterile conditions or overwatering which creates an ideal environment for pathogens.
- Solution: Prevention is better than cure – always sanitize all equipment before use, including scissors, containers, etc., and periodically clean the system entirely ensuring no residual organic matter remains that could breed bacteria or fungi. If you detect signs of infection (like discoloration or wilting), remove affected plants immediately to prevent spreading. Use organic anti-fungal/anti-bacterial agents suitable for aeroponic systems as treatment.
Remember that “perfect” doesn’t exist in gardening or DIY projects; there will always be room for learning and improvement! Discover some of our tips and tricks for aeroponic cloning to increase your chances of success.


