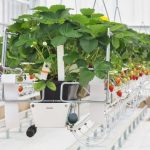
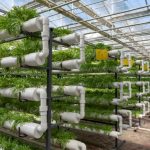
Aeroponic cloning is a revolutionary method in the realm of plant propagation with the promise of high efficiency and superior results. It’s a technique that allows you to duplicate your favorite plants without using soil or traditional mediums, taking advantage of misting nutrient-laden water directly onto plant roots suspended in air. This innovative method has raised the bar significantly for propagating plants, enabling enthusiasts and professionals alike to multiply their prized specimens with unprecedented ease.
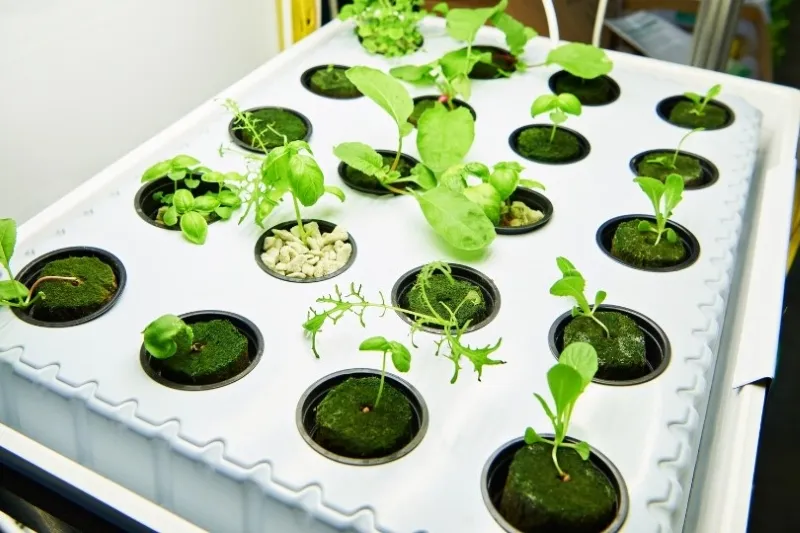
The benefits of aeroponics cloning over traditional methods are multi-dimensional. For starters, it accelerates growth, significantly curbs disease transmission, and reduces the resources necessary for successful propagation. By eliminating soil from the equation, it also circumvents many common issues like pests and root diseases that often accompany soil-based growing. The end result is healthier clones ready to grow robustly into their vegetative stages.
With this guide, you’re about to embark on an insightful journey into this cutting-edge method of plant propagation. We’ll delve deep into practical guidance while also shedding light on professional tips that will make your aeroponic cloning venture a success right from the start.
Understanding Aeroponic Cloning
Simply put, aeroponic cloning involves suspending plant cuttings in air and regularly misting their exposed roots with nutrient-rich water. This intriguing system stands in stark contrast to other propagation methods such as water or soil cloning, where the roots either remain immersed in water or buried in soil. These traditional methods often expose plants to diseases and pests, whereas aeroponics sidesteps these risks by eliminating any medium that could harbor these threats.
Here are the main steps involved:
- First, cuttings are taken from the parent plant.
- The cuttings are then suspended in a closed or semi-closed environment where they’re exposed to a nutrient-rich mist.
- The environment is typically controlled for factors like temperature and humidity to ensure optimal growth conditions.
- Over time, the cuttings develop roots and can be transferred to another growing medium.
This method is highly efficient as it uses less water and nutrients than traditional soil-based methods. Additionally, because the roots are exposed directly to air, there’s more oxygen available, which can stimulate faster root development. It’s also worth noting that this method requires more precise control over environmental conditions compared to other methods.
The Benefits of Cloning With Aeroponics
The world of plant propagation has been invigorated by the advent of aeroponic propagation, a method that boasts an array of compelling benefits. The first noticeable advantage is an increased success rate in the cloning process. This is similar to one of the main benefits of aeroponic gardening. Because aeroponic propagation systems expose roots to optimal conditions including constant access to nutrients and oxygen, plants can streamline their energy towards growth rather than hunting for sustenance in soil or water.
Tied closely to this vibrant growth is a significantly reduced risk of disease transmission. In traditional soil-based growing methods, pathogens often lurk in the substrate, ready to strike vulnerable young plants. Aeroponics bypasses this issue entirely—the absence of a growth medium eliminates potential disease vectors, ensuring your progeny remain robust and healthy.
Let’s not forget about the accelerated growth rates either! Faster development times are a direct result of higher nutrient availability. Without barriers like soil or excess water between root systems and valuable nutrients, plants don’t just grow; they thrive (and do so faster). This approach paves the way for healthier, more vigorous clones.
When it comes to space utilization and scalability, aeroponics shines brightly too. As there’s no need for large plots of land or extensive pot setups, you can cultivate more plants in less space—an undoubted boon for those working with limited room. Moreover, expanding an aeroponic system is as simple as adding new misting modules—making it incredibly scalable whether you’re operating from a small home setup or a sprawling commercial greenhouse.
Essential Equipment and Setup
To start your journey into aeroponics cloning, you’ll need to gather some essential equipment. The following is a comprehensive list of what you’ll require:
- A clone machine or chamber: This is where your plants will be housed. It’s essentially a box with holes on top for plant cuttings and openings at the bottom to allow roots to hang directly in the air. Here’s all you need to know about how to build a homemade clone machine for aeroponics.
- Misters or sprayers: These devices are responsible for delivering a nutrient-rich mist directly to your plant roots. They should be high-quality and capable of producing an ultra-fine spray.
- A reservoir: This container holds the nutrient solution that will be misted onto your plants’ roots.
- An air pump and stones: These help oxygenate the nutrient solution in the reservoir, promoting better uptake by the plants.
Once you have all your equipment ready, follow these steps to set up an efficient aeroponic cloning system:
- Start by cleaning all components thoroughly to prevent any risk of contamination.
- Place your air stones in the reservoir and connect them to the air pump.
- Fill the reservoir with water (distilled is preferable) and add nutrients according to the manufacturer’s instructions. Balance pH as necessary.
- Install your misters or sprayers in the aeroponic cloner machine or chamber, ensuring they’re positioned correctly so that they can mist every root zone evenly.
- Now place your plant cuttings in their designated slots within your clone machine or chamber.
In terms of additional tools for success, consider getting a grow light optimized for vegetative growth—it can significantly boost growth rates if you’re growing indoors without access to ample natural light. A thermometer/hygrometer combo would also be beneficial for monitoring temperature and humidity levels within your setup; maintaining optimal conditions will ensure robust growth of clones. Our guide on choosing the best aeroponic cloner is for those who are not DIYers!.
Aeroponic Cloning Tips
Successful cloning requires precise control over multiple variables to provide the best possible growing environment for your clones. In this section, we will provide some essential tips for those stepping into the world of aeroponic propagation.
Selecting Suitable Plant Cuttings Before Cloning With Aeroponics
Selecting the right plant cuttings is a vital first step toward successful aeroponic cloning. The health and traits of the cutting you choose are directly transferred to the clone, making this selection process integral to replicating desired characteristics or preserving a particularly valuable specimen.
A wide variety of plants respond well to cloning with aeroponics, with herbs like basil, mint, and rosemary being common favorites due to their hardiness and rapid growth rates. Ornamental plants such as begonias and geraniums are another good choice owing to their robust root systems. However, woody perennials like shrubs or trees may prove more challenging because they can require longer rooting times and specific conditions that might be harder to provide in an aeroponic setup.
When it comes to choosing a mother plant for cuttings, aim for healthy, disease-free specimens that exemplify desirable traits—be it fast growth, high yields, or particular aesthetic qualities like color or form. Once your mother plant is selected:
- Look for new growth—it’s generally softer and roots more readily than older wood.
- Cut just below a node (where leaves attach) as this is often where roots are most eager to sprout.
- Make sure your cuttings are not too large—a length of 4-6 inches with several leaf nodes often works well.
- Use a sharp clean tool for taking cuttings; this minimizes damage and reduces risk of introducing pathogens.
With these tips under your belt, you’ll be well-equipped to select suitable plant cuttings for successful propagation via aeroponic cloning. Also, take a look at our suggestions for selecting the best plants for aeroponics.
Preparing Cuttings for Aeroponics Cloning
Taking and preparing cuttings are key steps in aeroponic cloning that require precision and care. The process begins with using a clean, sharp knife or scissors to take the cutting. Ensure these tools are sterilized before use to minimize the risk of introducing disease-causing pathogens into your propagation setup.
When you’ve identified a suitable branch or stem on your mother plant, make a diagonal cut about 4-6 inches from the tip of the branch. A diagonal cut increases the surface area at the base for roots to emerge. Aim to make this cut just below a node (where leaves meet the stem), as this is where new roots typically form.
Once you have your cutting, it’s time for some prepping. Begin by removing excess leaves, particularly those toward the lower end of your cutting—this reduces moisture loss and directs more energy towards root development rather than maintaining unnecessary foliage. However, don’t strip it bare; leave a couple of leaves at the top to enable photosynthesis.
If desired, you can also dip the end of your cutting into rooting hormone. This step isn’t always necessary but can encourage quicker root development which is beneficial especially for plants that are traditionally harder to clone.
Throughout these processes, cleanliness cannot be overstated. Always work on clean surfaces and sterilize tools before use to keep contamination and disease risk at bay. Consider wearing gloves during handling too—they not only protect plants from any harmful residues on your hands but also prevent any harmful bacteria from crossing over onto your cuttings.
How To Use an Aeroponic Cloner: Rooting Mediums and Transplanting Clones
After your cuttings are well-prepared, the next step is to transplant them into a suitable rooting medium. This crucial stage in aeroponic propagation typically begins once roots have developed adequately, usually visible as white, healthy sprouts emerging from the base of your cutting. The timing can vary depending on the plant species and environmental conditions but generally falls between 5-14 days post-cutting.
In aeroponic systems, you won’t be using traditional soil or compost as a rooting medium. Instead, you’ll employ items like neoprene collars or foam cubes that hold the cuttings in place while leaving roots exposed for optimal misting. Neoprene collars are particularly popular due to their flexibility—you can easily fit different stem thicknesses—and they’re reusable, too!
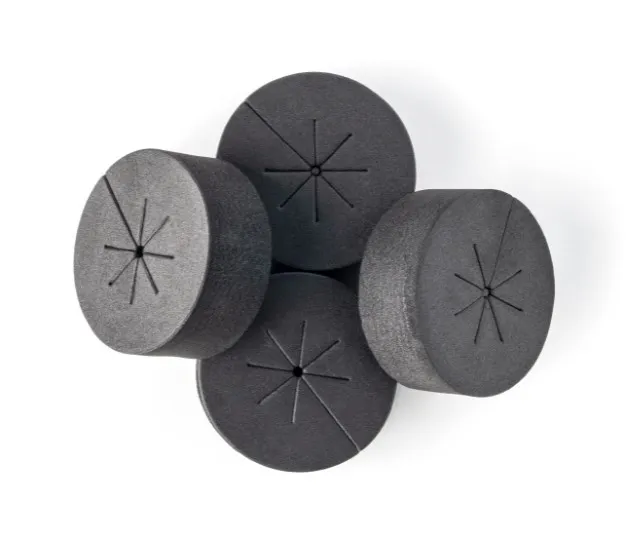
When it comes to inserting your cuttings into these mediums, be gentle yet firm. Slide your cutting through the hole in the collar or cube until it’s held securely—usually when the first set of leaves rests just on top of the medium surface. Ensure that the bottom end of your cutting (where roots will emerge) is positioned freely beneath this medium.
In terms of maintaining optimal moisture levels, remember: aeroponics is all about misting not soaking! Your cuttings’ roots should be frequently misted with nutrient-rich water but never submerged or left sitting in standing water—this could lead to root rot and other complications.
As you navigate through these steps and make your transplanting decisions wisely, you’re nurturing flourishing plants ready for their next phase within the fascinating world of aeroponic cloning.
Preparing the Aeroponic Cloning Solution
The nutrient solution used in your aeroponics cloning system is the lifeblood of your plants. It provides all the essential nutrients directly to the exposed roots, making a balanced concoction absolutely crucial for successful cloning.
For healthy root development and overall plant growth, your nutrient solution needs to include key macronutrients—namely Nitrogen (N), Phosphorus (P), and Potassium (K). However, it doesn’t stop there; micronutrients like Calcium (Ca), Magnesium (Mg), Iron (Fe) among others play equally pivotal roles in facilitating vigorous plant growth.
Preparing a well-balanced nutrient solution isn’t an overly complex process. Start by acquiring a high-quality hydroponic nutrient mix from a reputable gardening store. These mixes are usually complete with both macro and micronutrients needed by plants. Dilute this mixture with water as per the manufacturer’s instructions, being careful not to exceed recommended concentrations—a more concentrated mix isn’t necessarily better and can harm your plants.
Providing Optimal Growing Conditions and Monitoring Progress
Beyond the preparation of the nutrient solution, maintaining optimal conditions within it is key. Regularly monitor pH levels—the ideal range is typically between 5.5 and 6.5 for most plants—and adjust as necessary using pH up or down solutions available commercially. Remember that over time, nutrients in your solution will be depleted as they’re absorbed by plants. To ensure continued availability of these essentials, change out your nutrient solution every two weeks or so—or whenever you notice a decline in plant health.
Keeping an eye on the room temperature is also important; aim for room temperatures between 68°F to 78°F during the day, dropping slightly lower at night. At these temperatures, roots can absorb nutrients effectively without becoming stressed or damaged.
Humidity is another essential factor. During the initial stages of cloning when plants are yet to develop full root systems, maintaining high humidity (around 70-80%) helps prevent cuttings from drying out. As they mature and roots form, gradually lower humidity levels to around 40-60% to encourage hardening off and reduce risks of mold or fungal issues.
Lighting is equally crucial and often under-appreciated. Clones don’t need intense light—instead, aim for diffused sunlight or fluorescent lights positioned about 6-8 inches above the clone tops for 18 hours per day. This promotes healthy development without risking light burn.
Ventilation also deserves a mention here—it ensures adequate airflow which prevents buildup of stagnant air that could harbor molds or diseases while encouraging stronger stem growth. Using quiet fans can create gentle air movement mimicking natural breezes—a beneficial touch for indoor setups.
Common challenges with environmental conditions often include too-high temperatures leading to wilting, over-intense light causing leaf burn, or overly dry conditions allowing pests like spider mites to move in. Monitoring your setup closely allows you to identify such issues early on—you can then adjust temperature settings, reposition lights or increase humidity levels accordingly.
Related: Find out more about common problems with aeroponic cloning so that you can head them off from the start!
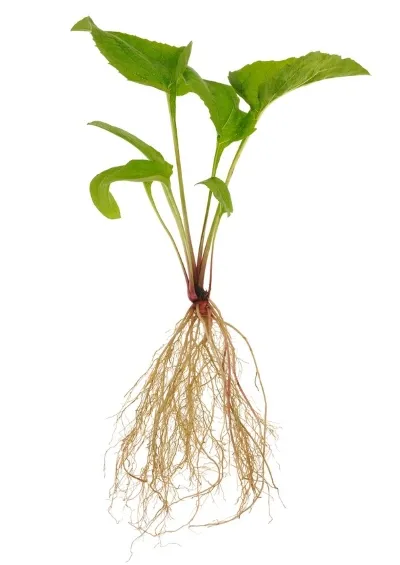
In terms of readiness for transplantation, look for well-developed roots that are white and healthy-looking (not brown or slimy). Once these roots reach around 1-2 inches in length with multiple branching points, your clones are typically ready to move on to their next phase of growth.
Successful cloning is all about observation and quick reactions to any changes in plant health. Keep an eye out, stay vigilant, and before long you’ll have robust plants cloned successfully via aeroponics!
Special Considerations for Various Plants
Successful aeroponic cloning isn’t a one-size-fits-all approach—it varies based on the type of plant you’re working with. Different species have unique requirements and success rates and thus call for special considerations.
Strains, for example, play a significant part in cloning. Some strains are harder to clone than others due to their genetic makeup; it’s always beneficial to do some research beforehand regarding the specific strain you’re planning to clone.
When it comes to the umbrella plant, for example, this tropical houseplant is generally easy to clone using the aeroponics method with high success rates. Make sure they receive bright but indirect light and maintain higher humidity levels during the initial stages of propagation.
Rosemary is another plant that clones well in an aeroponic system. Being a woody herb, it can take a little longer for roots to appear compared to more tender herbs—so patience is key!
Roses can be cloned successfully too although they may require careful handling due to their delicate nature. Pay close attention to maintaining optimal temperature and humidity levels when dealing with roses.
Lavender clones pretty well in aeroponics but prefers slightly cooler temperatures. It’s important to not over-nourish them with nutrients—these plants prefer poorer soils in general so mimic these conditions as closely as possible in your setup.
Woodsy plants like shrubs or trees often present more of a challenge due to their tougher stems and slower root development; however, they can still be cloned successfully provided you offer adequate care and patience during the process.
Finally, root vegetables aren’t typically propagated via cloning—they usually reproduce best from seeds or tubers. However, some growers have had success cloning certain types like beetroot or carrot tops purely for fun experimental growth rather than productive crops.
Each type of plant brings its own set of challenges and benefits when being cloned aeroponically—being aware of these differences will allow you to cater your efforts accordingly.
Comparing Aeroponic Cloning with Hydroponics and Soil
When it comes to plant propagation, aeroponic cloning stands out as a unique and efficient method. To gain a broader perspective, let’s compare aeroponic cloning with two other popular methods: hydroponic and soil-based propagation.
Hydroponics involves growing plants in nutrient-rich water without the use of soil. Like aeroponic cloning, it offers precise control over nutrient delivery. However, the main difference lies in how the roots are supported—hydroponic cloning systems typically use an inert medium like clay pellets or rockwool to anchor the plants. In contrast, aeroponics suspends the plants in air while misting their roots directly. Both methods boast high success rates and faster growth compared to traditional soil-based techniques but aeroponics has the slight edge with accelerated growth rates due to direct nutrient delivery and optimal oxygen availability for roots suspended in air.
Soil-based propagation relies on planting cuttings or seedlings directly into nutrient-rich soil. This method is familiar and often accessible for home gardeners; however, it can be more prone to pests, diseases, and inconsistent root development due to variations in soil quality. Aeroponic cloning eliminates these risks by providing a clean environment devoid of pathogens, ensuring rapid and healthy root development.
In terms of efficiency, aeroponics requires less space compared to hydroponic systems that need larger containers filled with water or solid media. Moreover, since there’s no need for large amounts of soil or compost materials used in traditional gardening practices with aeroponics or hydroponics—both methods are more resource-efficient and sustainable alternatives.
While each method has its merits depending on specific needs and preferences, aeroponic cloning remains a cutting-edge technique that offers unparalleled benefits for successful plant propagation. .

