In the vast world of gardening, aeroponic cloning has surfaced as a highly efficient and innovative method to propagate plants. However, like any cultivation technique, it is not without its challenges. This blog post will guide you through understanding and addressing common aeroponic cloning problems, ensuring your efforts produce healthy, thriving plants.
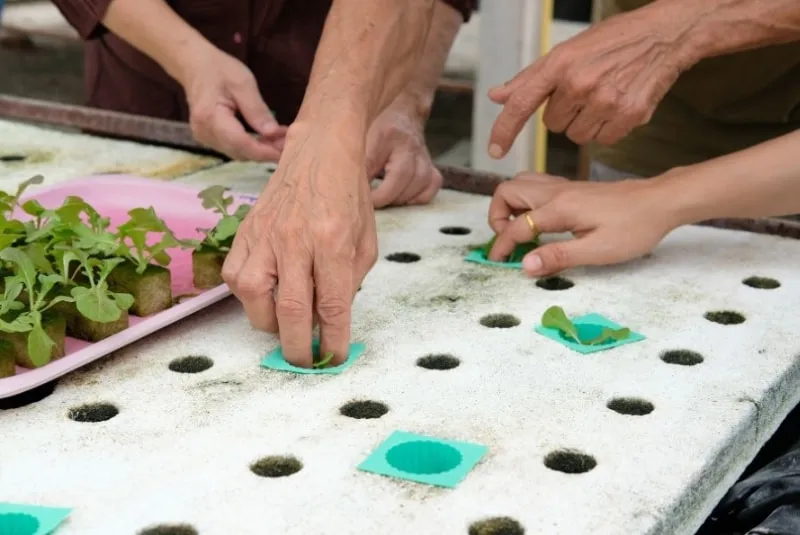
From initial setup to ongoing maintenance, we’ll explore the myriad factors that can influence the success or failure of your aeroponic cloning venture. By identifying potential pitfalls and providing effective solutions to combat these aeroponic cloning problems, this post aims to support both novice gardeners and experienced horticulturists alike in navigating this exciting methodology.
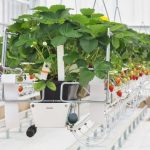
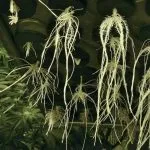
Aeroponic cloning is a soilless plant propagation method where cuttings from a mother plant are suspended in air and nourished with a nutrient-rich mist. This technique allows for faster growth due to unrestricted access to oxygen and nutrients, reduced risk of soil-borne diseases, and efficient use of space and resources. The plants in this system grow their own root systems over time, becoming new independent plants. Learn more about aeroponic propagation systems here.
There are a number of advantages that aeroponic cloning has vs. hydroponic cloning or traditional soil cloning. However, there are a few issues you may come across, especially when you try it for the first time.
Related: Aeroponics explained: A Comprehensive Guide
Common Aeroponic Cloning Problems
Clones Not Rooting In Aeroponic Cloner
Trying to grow from clones without success can be disappointing, especially when it leads to setbacks in your planting schedule or losses in desirable plant varieties. But worry not; this guide will help you understand and address the common issue of clones not rooting in an aeroponic cloner.
Reasons for Clones Not Rooting
Several factors could be behind your clones’ reluctance to root. Here are some of the most common:
- Improper Cuttings: If cuttings aren’t taken correctly, they may struggle to root. For example, they should be cut at a 45-degree angle and immediately placed in water after cutting.
- Unfavorable Temperatures: Clones prefer the aeroponic cloner water temp to be between 68-77°F (20-25°C). Too hot or too cold environments can slow down or even prevent root growth.
- Insufficient or Too Much Light: While clones need light for photosynthesis, too much direct light can cause them stress, inhibiting root development.
- Poor Water Quality: High levels of chlorine or improper pH balance (ideally between 5.5 – 6.5) can impact your clone’s ability to root.
- Inadequate Nutrient Balance: Clones require specific nutrient mixes for successful rooting, and a deficiency or an excess might inhibit their ability.
Identification of the Problem
Knowing what signs to look out for will help you identify if your clones have a problem rooting:
- Check the base of your cutting for any root buds; their absence could indicate a potential issue.
- Look out for wilted or discolored leaves as these also suggest that there is an issue with rooting.
- Monitor how long it takes for roots to appear; anything beyond two weeks could signify delayed rooting.
Prevention Strategies
Preventing issues before they arise is paramount:
- Proper Clipping Practices: Ensure cuttings are taken correctly and swiftly moved into water post-cutting.
- Optimal Climate Control: Maintain a consistent temperature inside your cloning space within the preferred range.
- Controlled Lighting: Provide indirect light or use lights specifically designed for seedlings and cuttings that won’t overheat them but offer sufficient energy for photosynthesis.
- Regulated Water Conditions: Use filtered water with correct pH levels and ensure it’s free from contaminants like chlorine and heavy metals by testing regularly.
- Balanced Nutrients: The use of specially formulated cloning solutions can give your cuttings the nutrients they need without overwhelming them.
If you’re building your own DIY aeroponic cloning machine, make sure you incorporate the above practices right from the start. These practices apply even if you buy a complete system. Choose one of our recommended best aeroponic cloners.
Treatment Options
If prevention strategies don’t work out as mentioned above, consider these treatment options:
- Use a proven rooting hormone that helps stimulate root growth on new cuttings.
- Recheck the environmental conditions such as temperature, lighting condition and make necessary adjustments accordingly.
- If using tap water, allow it to sit uncovered overnight before use; this allows chlorine content time to evaporate off naturally.
Root Rot
Root rot is a pernicious problem that can plague aeroponic cloning efforts. It’s a condition where the roots of plants become infected by pathogens, often resulting in browning, wilting, and eventual death of the plant. In aeroponics, root rot tends to be caused by two primary factors: overwatering or an imbalance of nutrients and pH levels. The moist environment can be a breeding ground for harmful fungi and bacteria if not appropriately managed.
Identifying Root Rot in Clones
Spotting root rot early is vital for saving your plant clones. Look closely at the roots; healthy roots should appear white to pale yellow and have a firm structure. If you notice any discoloration (typically turning brown or black), softening, or slimy texture, these are indicative signs of root rot infestation.
Additionally, above-ground symptoms can also provide hints towards root rot. Clones infected with this malady may exhibit signs like yellowing leaves, stunted growth, or wilting even with sufficient water supply.
Preventing Root Rot
Prevention is always better than cure when it comes to managing root rot in aeroponic systems. Here are some strategies you can employ:
- Maintain Proper Nutrient Balance: Over-fertilization can lead to nutrient burn and make plants more susceptible to diseases like root rot. Use a high-quality nutrient solution designed specifically for aeroponics and follow the recommended dosage instructions.
- Adjust pH Levels: Most harmful microorganisms thrive in highly acidic conditions. Maintaining your water’s pH between 5.5 and 6.5 makes it less hospitable to these pathogens while still being optimal for your plants’ nutrient absorption.
- Use Beneficial Bacteria: Introducing beneficial microbes into your system creates competition for resources with harmful bacteria and fungi that cause root rot. Products containing Bacillus subtilis or Trichoderma species are known for their pathogen-combatting properties.
Treating Root Rot
Despite taking all precautions, if you still find yourself dealing with root rot in your clones, don’t despair – there are treatment options available:
- Hydrogen Peroxide Drenches: A solution of hydrogen peroxide (H2O2) helps kill off the harmful microorganisms causing root rot without damaging the plants themselves. Typically a 3% solution is used; soak the affected roots thoroughly for best results.
- Beneficial Microbe Applications: Applying products rich in beneficial microbes directly onto affected areas can help combat the disease by out-competing bad bacteria and additionally enhancing the overall health of your plant’s microbiome.
Wilting or Drying Out
One common concern is wilting or drying out of clones.
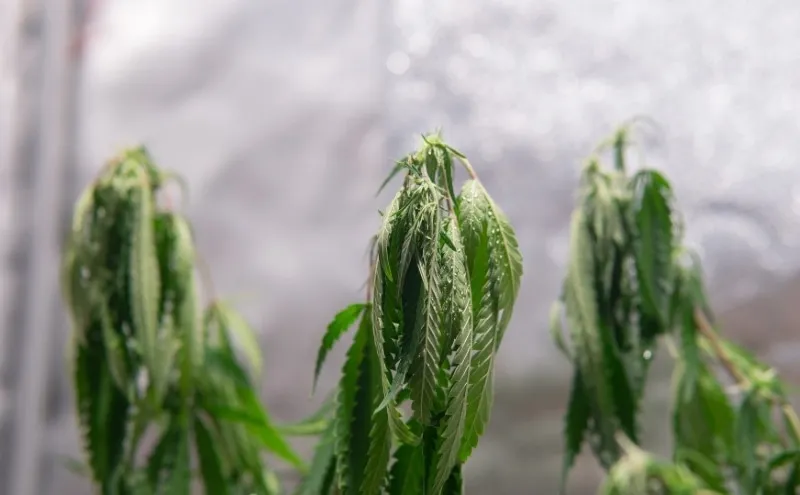
Causes behind Clone Wilting or Drying Out in an Aeroponic System
The primary reasons include:
- Insufficient Misting: If your mist cycles are too far apart, the roots may not receive enough moisture leading to dehydration.
- Inadequate Humidity Levels: Unlike soil-based growing methods where moisture retention is relatively easier, maintaining proper humidity levels in aeroponics can be tricky. Low humidity can rapidly lead to water loss from the leaf surface causing wilting.
- Suboptimal Environmental Conditions: Extreme temperatures and improper airflow could also cause stress on your plant clones, leading to wilting or drying out.
Signs Indicating Wilting or Drying Out
Identifying potential problems early can save your precious plant clones. Here are some signs that suggest that your clones might be suffering from wilting or drying out:
- Droopy Leaves: This is usually one of the first signs. If leaves that were previously firm have become soft and droopy, this could indicate insufficient water uptake.
- Discoloration: Look for changes in leaf color like yellowing or browning at the edges as they often hint at dehydration.
- Stunted Growth: If your clone’s growth seems slower than usual despite other conditions being optimal, it might be struggling with moisture issues.
Solutions for Preventing Wilting or Drying Out
Luckily, once you’ve identified the problem, there are several effective ways to restore your aeroponic system back to balance:
- Maintain Proper Humidity Levels: A hygrometer can help monitor indoor humidity levels. Ideally, for aeroponic systems during cloning stage maintain 70%-75% relative humidity (RH).
- Increase Misting Frequency: You may need more frequent misting cycles depending upon the ambient environment and plant type. Always make sure root zones remain moist but not overly saturated.
- Adjust Environmental Conditions: Maintain an optimal temperature range between 68°F – 72°F during light periods and not less than 65°F during dark periods. Also ensure adequate ventilation without subjecting plants to harsh drafts.
Stunted Growth in Aeroponic Cloning
Another common issue that often perplexes cultivators is stunted growth.
Factors Causing Stunted Growth
Stunted growth in aeroponic clones can stem from a variety of factors:
- Inappropriate Nutrient Solution: The strength of your nutrient solution plays a crucial role in plant health. Too strong a solution may cause nutrient toxicity, while too weak a mix might result in deficiencies — both leading to stunted growth.
- Insufficient Light: Adequate lighting is vital for photosynthesis, the process responsible for plant growth. Low light levels may cause plants to slow their growth rate as they struggle to photosynthesize effectively.
- Suboptimal Environmental Conditions: Conditions like temperature, humidity, and airflow are essential for optimal plant development. Abnormal conditions can stress plants leading to slower or stunted growth.
Indicators of Stunted Growth
Identifying stunted growth early on is key to mitigating its impacts. Look out for these signs:
- Slowed Development: If you notice that your plants are not growing at their usual pace or are lagging behind their expected developmental stages, it could be an indication of stunted growth.
- Small Leaves and Short Stems: An apparent sign of stunting is unusually small leaves or shortened stems compared to healthy counterparts at the same stage of development.
- Discoloration or Leaf Drop: While these symptoms can manifest due to several issues, they often accompany stunted growth if caused by nutrient imbalances or environmental stresses.
Strategies to Overcome Stunted Growth
The good news is that there are effective strategies available to overcome this issue:
- Optimize Nutrient Solution Strength: Accurately measure nutrients using an Electrical Conductivity (EC) meter before adding them into the system. Follow manufacturer instructions regarding concentrations and remember that less is sometimes more when it comes to nutrients.
- Provide Adequate Lighting: Whether using natural or artificial lights, ensure your plants get enough lumens per day suitable for their specific type and stage of life cycle. Consider investing in adjustable-intensity lights which allow you flexibility depending on plant requirements.
- Manage Environmental Conditions: Keep environments at optimal temperatures (typically around 65 – 75°F), maintain relative humidity between 40% – 70%, and ensure good airflow around the plants. Tools like hygrometers, heaters/coolers, humidifiers/dehumidifiers, fans etc., can aid in maintaining these conditions.
With these insights into understanding and addressing the issue of stunted growth during aeroponic cloning, you’re well equipped to tackle this problem head-on should it arise. Remember — patience paired with observation skills will go a long way in ensuring your clones thrive.
Algae and Mold Growth in Aeroponic Cloning
Algae and mold represent a common challenge to those who use aeroponic systems. They can compromise plant health, hinder growth, and negatively impact overall cloning success. Understanding how these unwanted organisms develop in an aeroponic environment paves the way for effective prevention and treatment.
Development of Algae and Mold
Unlike plants, algae do not need soil to grow – they only require water, light, and nutrients. In an aeroponic system, where nutrient-rich water is constantly circulating, the conditions are ripe for algae to thrive. Unfortunately, when algae take hold, they can rapidly spread across your entire system.
Mold spores, similarly ever-present in the environment around us, also find the humid environment within an aeroponic cloning system very inviting. These spores need moisture to germinate – a requirement abundantly available in this context.
Identifying Algae and Mold Growth
The first step towards addressing any problem is recognizing its presence. Here is what you should look out for:
- Visual Indicators: Algae typically manifest as a greenish film or slimy substance on surfaces that are exposed to both nutrients solution and light. On the other hand, molds often appear as white or gray fuzzy patches on plant stems or leaves.
- Plant Health: A significant decrease in plant health might indicate an issue with algae or mold growth. Stunted growth, yellowing leaves or wilting could all be symptoms associated with these problems.
- Odor: Both mold and algae have distinctive odors which can help identify their presence before visual signs become apparent.
Prevention Techniques
Now that we’ve covered how algae and mold develop in your system as well as identifying signs of their presence, let’s delve into preventive measures.
- Maintain Cleanliness: Regular cleaning of your equipment helps to keep both algae and mold at bay. This includes sterilizing cloners between crops using products like hydrogen peroxide or bleach (diluted appropriately).
- Use Light-Blocking Materials: By blocking light from reaching areas where nutrient-rich water resides (like reservoirs), you reduce one of the key factors contributing to algae growth.
- Implement Proper Ventilation: Good airflow is crucial for preventing mold development by reducing excessive humidity around your plants.
Nutrient Imbalances in Aeroponic Cloning
One of the most common issues faced during aeroponic cloning is nutrient imbalances. Understanding nutrient imbalances is key to maintaining a healthy and thriving plant clone. They occur when the concentration of nutrients in an aeroponic system isn’t optimal for plant growth, either due to deficiencies (not enough) or toxicities (too much).
Recognizing Signs of Nutrient Deficiencies or Toxicities
Identifying signs of nutrient imbalances early can save your clones from irreversible damage. Here are some signs to look out for:
- Deficiencies: The physical symptoms often include yellowing leaves, stunted growth, weak stems, slow growth rate, and lower yield. Each deficiency will target specific parts of your plants. For example, nitrogen deficiency often affects older leaves first, while potassium deficiency tends to affect younger leaves.
- Toxicities: Too much nutrients are just as detrimental as too little. Common signs include brown spots on leaves (also known as leaf burn), curling leaf tips (known as leaf claw), reduced root growth, slower plant development, and wilting even with adequate water.
Remember that these symptoms can also indicate other issues such as disease or pest infestations so always cross-check before jumping into conclusion.
Corrective Measures for Nutrient Imbalances
Once you’ve identified a potential nutrient imbalance, it’s time to take corrective measures. Here’s how:
- Adjust pH Levels: Plants absorb different nutrients best at different pH levels within the slightly acidic range (5.5 – 6.5). If pH levels swing too far outside this range it can prevent proper nutrient uptake even if they’re present in ample amounts – leading to deficiencies.
- Monitor Nutrient Strength: Using a tool like an Electrical Conductivity (EC) meter allows you to measure the strength of your nutrient solution ensuring it’s not too weak (leading to deficiencies) or too strong (causing toxicities).
- Flush the System: Flushing involves running clean water through your aeroponic system to remove any excess salts from previous nutrient solutions that might be causing harm.
- Use Balanced Nutrient Solutions: Always use balanced and complete nutrient solutions formulated specifically for hydroponic systems which contain all essential macro and micro-nutrients.

