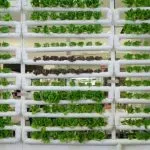
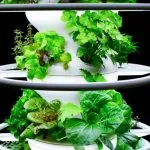
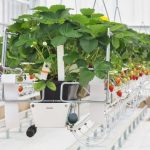
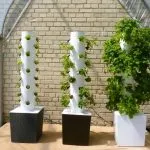
Ready to transform your gardening experience with an innovative and efficient approach? Look no further; the DIY vertical hydroponic garden is here to revolutionize your urban farming. Vertical hydroponics is a dynamic method of growing plants without soil, utilizing mineral nutrients in water to provide essential nourishment. This method allows you to grow your favorite plants in a compact, space-saving manner – perfect for urban dwellers and those with limited garden space.
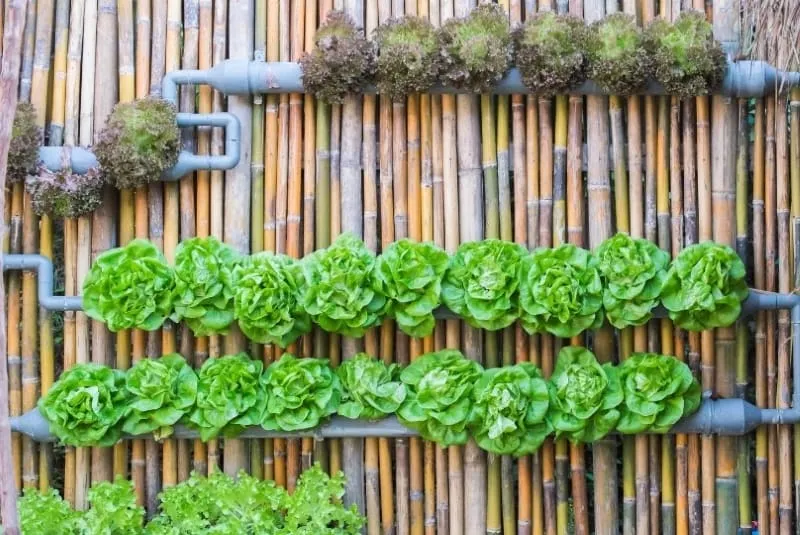
Setting up your own vertical hydroponic garden might seem like a daunting task, but fear not! With a bit of creativity and some basic materials, you can build a thriving, eco-friendly garden in no time. By following simple steps and incorporating essential components such as PVC pipes or 5-gallon buckets, you’re sure to create an impressive vertical garden. With labor-saving advantages and reduced resource consumption, this gardening method is a win-win for you and the environment.
- DIY Vertical Hydroponic Garden Basics
- Tools and Materials for the Project
- How to Build a DIY Vertical Hydroponic Tower Garden
- How to Build a DIY Hydroponic Wall Garden
- How to Build a DIY A-Frame Hydroponic System
- Nutrient Solutions and Water Management
- Installation of Grow Lights
- Advanced Hydroponic Systems
- Frequently Asked Questions
DIY Vertical Hydroponic Garden Basics
In a homemade vertical hydroponic system, you can grow a variety of plants without soil by using a nutrient-rich water solution. This method is perfect for those with limited space and makes it possible to enjoy gardening year-round. Let’s dive into the basics of how to set up a hydroponic garden at home.
Choosing the Right System
There are several types of hydroponic vertical gardening systems to choose from, such as PVC pipe stand systems, vertical towers, and hydroponic walls. Each has its own benefits and requirements, so explore your options to see which one fits best with your space and needs.
A-frame PVC pipe stand:
- Cost-Effective: PVC pipes are generally inexpensive and readily available. They’re also durable and resistant to different weather conditions, making them an economical choice.
- Easy to Assemble and Modify: The assembly of an A-frame PVC pipe stand is relatively simple with appropriate tools. This also makes it easy to modify or expand the system as needed.
- Improved Plant Health: A vertical hydroponic system can help improve plant health. This is because it allows for better air circulation around the plants, which can help prevent disease and promote growth.
- Versatility: The A-frame design can accommodate a wide variety of plants, making it a versatile choice for diverse gardening needs.
Vertical tower:
- Space-saving: Vertical towers utilize vertical space rather than horizontal space, which can be a crucial advantage if you’re working with a small area.
- Increased yield: Due to the vertical stacking of plants, you can grow more plants in the same footprint compared to traditional gardening.
- Efficient water use: Hydroponic towers often recirculate water, meaning they use less water than most other systems. Don’t confuse this with a DIY aeroponics tower that uses misters to spray the water directly on the roots.
- Visual appeal: Vertical towers can provide a visually pleasing and modern aesthetic to your home or backyard.
Wall garden:
- Ease of Maintenance: In wall systems, plants are typically more accessible. This can make planting, harvesting, and general maintenance easier.
- Better Light Distribution: Wall gardens can potentially allow for better light distribution, especially when using artificial lighting. This is because the plants are spread out on a flat plane instead of being stacked or layered.
- More Design Flexibility: Wall gardens offer more flexibility in design. They can fit into a variety of spaces, from small kitchen walls to larger outdoor areas, and can be made in many different sizes and shapes.
- Less Complexity: Wall systems can be simpler to set up and operate than A-frame or tower systems. They typically require less complex plumbing and fewer materials.
- Aesthetic Appeal: A green wall can be a unique and beautiful addition to your home, providing not just fresh produce, but also a living piece of art.
Plant Selection and Spacing
Select plants that are suitable for hydroponic growth and will thrive in your chosen system. Make sure to provide enough vertical space between plants to ensure proper airflow and prevent overcrowding.
Lighting and Temperature
Proper lighting is crucial for plant growth, especially if it’s a DIY indoor vertical hydroponic garden. Provide adequate lighting for the specific types of plants you’re growing. Temperature control is also crucial; most plants thrive in a consistent temperature range tailored to their needs.
Related: If you’re not a DIY kind of person and would prefer a complete, convenient and quick setup, then there are a few vertical gardens you can buy for your home. Choose from our picks of the best vertical hydroponic garden systems.
Tools and Materials for the Project
Creating your own vertical garden can be a rewarding project. To ensure success, it’s essential to gather the right tools and materials before you begin. In this section, we’ll outline everything you’ll need.
To start, PVC pipes are integral to creating the structure of your vertical hydroponic garden. You’ll also need a submersible pump to circulate the nutrient-enriched water to your plants. A drill is necessary for making holes in the PVC pipes and other materials, while glue will help you secure the PVC fittings. Don’t forget hose clamps to keep your hoses in place.
For the reservoir, you can use gallon buckets or a sturdy container to hold the nutrient solution. PVC gutters can be used as horizontal channels to hold the plants and allow water to flow. Additional materials like machine screws will help secure your structure and ensure it’s stable.
When it comes to hoses and tubing, a sturdy vinyl hose is an excellent choice for connecting your pump to the PVC piping system. A miter saw will help you cut the PVC pipes and other materials to the desired length for your project.
Here’s a summary of the tools and materials you’ll need:
- PVC pipes
- Submersible pump
- Drill
- Glue
- Hose clamps
- Gallon buckets or reservoir container
- PVC gutters (optional)
- Machine screws
- Vinyl hose
- Miter saw (or another saw for cutting PVC)
How to Build a DIY Vertical Hydroponic Tower Garden
Building a vertical hydroponic tower is a great way to grow your own produce in a limited space. In this section, you will learn how to build a DIY hydroponic garden tower using PVC pipes. The process is simple and requires only a few materials.
First, gather all the materials needed for your project. You will need a PVC pipe (4 to 6 inches diameter), end caps, net pots (5 cm diameter), perlite, and a heat gun. Make sure to clean the PVC pipe and other supplies before using them to ensure the proper growth of your plants.
To create the hydroponic unit, begin by cutting the PVC pipe into equal segments (about 2-3 feet long, depending on how high you want your tower to be). Use a drill to make evenly spaced holes on each segment, ensuring they are large enough to hold the net pots. The holes should be angled slightly upward to provide support for your plants once they are placed in the tower. Always ensure that there is enough room for the plant’s roots to grow without obstruction. Also, pay attention to the spacing of the holes you drill for the plants, which typically should be about 8 to 12 inches apart.
Once the holes are drilled, assemble the PVC segments by attaching end caps at the top and bottom. You can also secure the segments by using PVC glue if necessary. For added stability, consider adding a PVC T-connector or elbow at the bottom of the tower to support the structure when mounted on a base.
Next, fill your net pots with perlite, which will serve as the growing medium for your plants. Perlite is an excellent choice because it is lightweight, allows proper drainage, and promotes healthy root growth. After filling the net pots with perlite, insert them into the holes you drilled in the PVC pipe.
To set up the watering system for your DIY hydroponic tower, you can use a simple gravity-fed drip irrigation system or install a small water pump to circulate the nutrient solution through the pipes. It’s essential to provide a consistent water supply for your plants to ensure proper nutrient delivery and growth.
Finally, find a suitable location for your hydroponic garden tower, such as a balcony, rooftop, or backyard. Make sure it receives ample sunlight and is easily accessible for maintenance. Once the tower is set up, plant your seedlings in the net pots and watch your vertical hydroponic garden flourish.
How to Build a DIY Hydroponic Wall Garden
Building a DIY hydroponic wall garden can be a fun and rewarding project. With the right materials and a bit of effort, you can create a space-efficient, self-watering garden in no time. In this section, we’ll guide you through the steps to put together your very own hydroponic wall garden.
Before you begin, gather the necessary materials. Common items you’ll need include PVC pipes, a water reservoir (such as a 45-gallon tank), a water pump, vinyl fence posts, and plastic sheets. These materials will help you build the structure and provide support for your plants.
Start by constructing the vertical structure using PVC pipes. Cut the pipes into appropriate lengths and drill holes for the plants to grow through. Stagger the holes to create a more visually appealing design and provide ample space for the plants.
Next, create a water reservoir by using a large tank or a suitable container. Make sure to prepare a lid for the tank, which should be opaque to prevent the growth of algae. The lid will also provide support for the vertical structure, ensuring stability.
Attach a water pump to the reservoir to circulate nutrient-rich water through your hydroponic system. Connect hoses from the pump to the PVC pipes, ensuring an efficient flow of water to your plants. When setting up the pump, consider the height of your wall garden to ensure proper water pressure.
Now that your hydroponic wall garden structure is complete, it’s time to add plants! Choose plants that are well-suited for hydroponic systems, such as leafy greens, herbs, or small fruit-bearing plants, like strawberries or cherry tomatoes. Be sure to select plants with similar water and nutrient requirements to ensure compatibility.
When planting, insert the plant roots through the holes in the PVC pipes and secure them with a small amount of growing medium, such as coco coir or perlite. This will help anchor the plants in place and provide a stable environment for their roots to grow.
Once your plants are securely positioned, turn on your water pump and begin the hydroponic cycle. Over time, you’ll notice your plants thriving in their new environment without the need for soil or extensive maintenance.
How to Build a DIY A-Frame Hydroponic System
Building a DIY A-frame vertical hydroponic garden system is a great way to grow plants in a limited space using minimal resources. The following guide will help you create your own hydroponic A-frame build with ease, using a friendly and approachable tone.
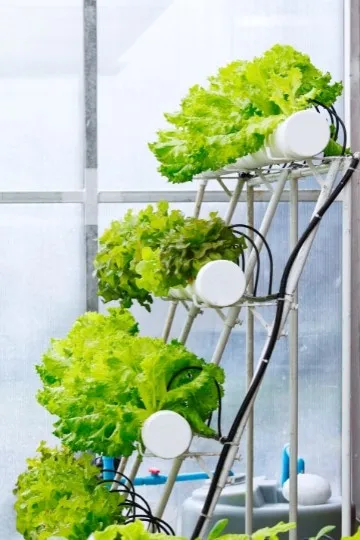
First, gather the necessary materials for your hydroponic A-frame build. You will need:
- Timber (for the frame)
- 3-inch sewer/drain pipe
- 3/4-inch pipes
- Digital thermometer
- 1/4-inch water hose pipes
- Pipe connectors and caps
- Pipe brackets
- O-ring/silicone
- Plastic cups (for plant holders)
Start by constructing the A-frame using the timber. Choose a suitable size for your hydroponic A-frame dimensions, taking into consideration the available space and the number of plants you want to grow. A 6’x10′ footprint can hold up to 168 plants, but you can adjust the dimensions according to your needs.
Next, cut the 3-inch sewer/drain pipe into sections that will be attached to the A-frame. These will serve as the channels for nutrient-rich water to flow through and nourish your plants. Attach the pipe sections to the A-frame using pipe brackets, ensuring they are properly secured and level.
Drill holes in the pipe sections for your plants to sit in. Make sure the holes are evenly spaced and large enough to accommodate the plastic cups that will hold your plants. To prevent water leakage, seal the holes with O-ring or silicone.
Install the 3/4-inch pipes to circulate water throughout the system. These will connect the sewer/drain pipes to the main reservoir, where nutrient-rich water is stored. Use pipe connectors and caps to create a closed loop that ensures water flows smoothly through the system without any leaks or blockages.
Now place the plastic cups into the holes you’ve drilled in the sewer/drain pipes. These will serve as plant holders, and it’s important to choose cups that have good drainage to allow excess water to escape while holding the plant’s roots firmly in place.
Lastly, set up the 1/4-inch water hose pipes for an irrigation system that will distribute water evenly throughout the A-frame. Connect the hoses to the 3/4-inch pipes and use a digital thermometer to monitor the water temperature, ensuring it stays within the optimal range for your plants’ growth.
Your DIY A-frame vertical hydroponic garden system is now complete! With this setup, you can enjoy growing a variety of plants in a compact space while conserving water and nutrients. Enjoy your new hydroponic A-frame garden!
Nutrient Solutions and Water Management
Managing water and nutrient solutions is essential for a successful DIY vertical hydroponic garden. Your plants will rely on the nutrient-rich water you provide to grow healthily and produce fresh produce.
Begin by choosing the right nutrient solution for your hydroponic vertical garden. There are pre-mixed solutions available that cater to specific plant types, such as tomatoes. However, you can also create a custom nutrient solution according to your plants’ needs. Remember to keep the pH level of your nutrient solution between 5.5 and 6.5 to ensure optimal nutrient uptake by your plants.
In your hydroponic garden, a water reservoir will house the nutrient solution. It’s crucial to regularly monitor the water level in the reservoir and refill it as needed to maintain a consistent supply for your plants. Also, check the water temperature, as it should be in the range of 65-75°F (18-24°C), which is ideal for most plants.
When it comes to plant nutrients, there are three primary categories: macronutrients, micronutrients, and trace elements. Macronutrients include nitrogen (N), phosphorus (P), and potassium (K), which are vital for plant growth. Micronutrients, such as calcium, magnesium, and sulfur, are also necessary but in smaller amounts. Trace elements like iron, manganese, boron, and zinc are needed only in very minute quantities but are still essential for healthy plant development.
To ensure a thriving hydroponic garden, you should frequently test the nutrient solution to maintain optimal nutrient levels and pH. This will help you adjust the solution accordingly and prevent any deficiencies that could affect your plants’ growth.
Installation of Grow Lights
When it comes to installing grow lights for your DIY vertical hydroponic garden, it’s essential to consider the specific needs of the plants you’re growing. Generally, you’ll want to allow for at least 14 to 16 hours of artificial light, followed by 10 to 12 hours of darkness every day. Remember, darkness is as vital as light for plants, as they need time to rest and metabolize food, just like animals.
To get started, you’ll need to choose the right type of grow light for your garden. There are several options available, like fluorescent lights, high-intensity discharge (HID) lights, and LED lights. Fluorescent lights are affordable and easy to install but might not be the most energy-efficient choice. HID lights provide powerful light output, suitable for larger gardens, while LED lights are energy-efficient and have a long lifespan.
Next, position your grow lights correctly in your vertical hydroponic setup. Make sure they are evenly spaced out to ensure that all plants receive the appropriate amount of light. Depending on the type of light you’ve chosen, you might need to hang them at different heights to get the right coverage. For instance, LED lights can be placed closer to the plants compared to HID lights due to their lower heat output.
When installing grow lights, it’s crucial to use timers to control the light cycles properly. This will ensure that your plants receive the correct amount of light and darkness each day. Be mindful of potential heat issues, especially when using HID lights, as they can generate significant amounts of heat. Ensure that your garden space is well-ventilated and that there’s enough distance between the lights and plants to avoid overheating.
Lastly, always make sure to follow the manufacturer’s instructions on setting up and maintaining your grow lights. Regularly check the bulbs for any signs of wear and replace them as necessary. By providing your plants with proper lighting, you’ll be contributing to the success of your DIY vertical hydroponic garden.
Advanced Hydroponic Systems
Innovative and space-saving, vertical hydroponic farms present an excellent solution for those of you wanting to grow plants in limited space. With a method designed for high-density yields and efficiency, you’ll quickly discover the benefits of this gardening technique.
To start, let’s explore hydroponic systems in which plants are grown without soil, usually suspended in nutrient-rich water. Vertical hydroponic farming takes this concept a step further by stacking plants vertically, maximizing the number of plants you can grow in limited space. This high-density yield allows you to enjoy fresh produce even if your gardening area is restricted.
You’ll find various types of vertical hydroponic systems available, but they mainly fall into two categories: stacked and tower systems.
- Stacked hydroponic systems are composed of trays or shelves layered one above the other, containing plants in between. Nutrient-rich water flows from the top and is collected at the bottom, ensuring each plant receives the nutrients it needs to grow.
- Vertical tower systems feature a central column to support the plants, reducing the need for horizontal space. The water and nutrient solution are pumped to the top and trickle down, supplying each plant with the necessary nourishment.
Given the efficiency of these systems, you’ll be able to grow various types of plants and enjoy the perks of having your own vertical hydroponic farm. Don’t be alarmed if it might seem complex at first; with some research, practice, and patience, you’ll soon master the art of vertical hydroponic gardening. Ultimately, your quest for a friendly, efficient, and high-density yield method of growing plants will be a reality through this advanced hydroponic system.

