Boosting the green factor in your living space or backyard doesn’t always require soil and extensive ground space. Embrace the world of aeroponics and learn how to build an aeroponic tower garden, a modern method of gardening that reaches for the sky. This dynamic approach combines the efficiency of vertical hydroponics with eco-friendly aeroponics, allowing you to grow lush plants in a limited area.
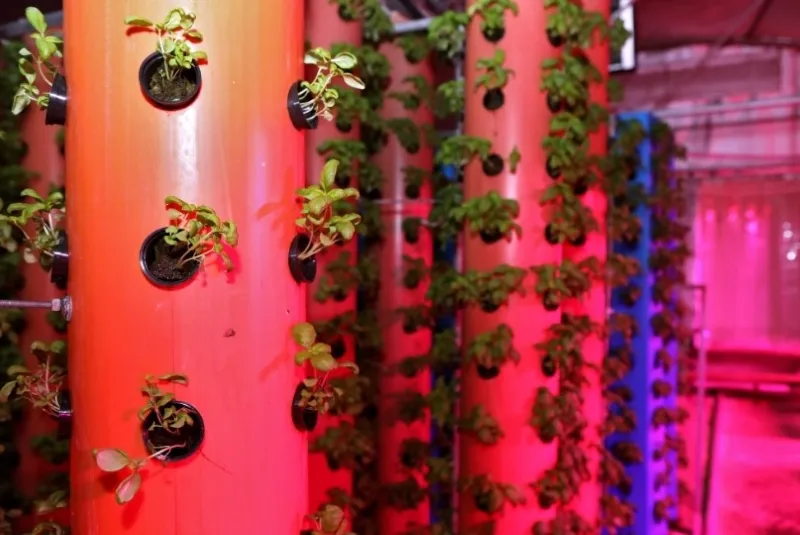
In this comprehensive DIY guide, we will walk you through the step-by-step process of building your very own aeroponic tower. By following our detailed instructions and tips, you’ll be able to create a space-efficient, eco-friendly garden that can produce an abundance of fresh herbs, vegetables, and even flowers. Whether you’re a seasoned gardener or new to the world of hydroponics, this guide will equip you with all the knowledge you need to successfully build and maintain an aeroponic tower garden.
Aeroponic Tower Garden Basics
In the realm of efficient gardening methods, constructing an aeroponic tower garden stands out as an innovative approach. At its core, it is a vertical hydroponics system that uses the principles of aeroponics to nourish plants.
Aeroponics is a method where plants are grown in an air or mist environment without using soil. The primary feature that distinguishes this system is that it allows plants to be suspended in air while nutrients and water are directly sprayed on the roots. This manner of gardening is highly efficient as it maximizes space usage and reduces water consumption dramatically compared to traditional soil-based agriculture. Learn more about aeroponics in general.
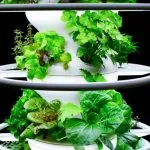
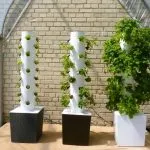
Tower gardens or aeroponic towers, as they are often referred to, beautifully bring together the concepts of aeroponics and vertical hydroponics. The structure typically involves a tall, modular column filled with growing spaces for multiple plants. This arrangement allows gardeners to cultivate a variety of ecologically diverse plant species in one compact area. These towers can range from simple PVC pipe constructions at home DIY projects, up to intricate commercial systems used for large-scale plant production.
Small to medium towers can be purchased as a complete kit, so if you’re interested in that route we have a guide to show you the best aeroponic towers available. Keep in mind that they range in price from $300 to over $1000, so if you have a small budget, it can be cheaper to build your own.
The efficiency aspect of these tower gardens comes from their vertical design which utilizes otherwise unused airspace, freeing up valuable ground space for other activities or more towers! Also, because watering and nutrient delivery is precisely controlled and any excess can be recirculated back into the system, there’s minimal waste involved — making this method exceptionally eco-friendly.
So if you’re looking to transform your garden by going upwards rather than outwards while maximizing productivity and efficiency, then building an aeroponic tower garden should definitely be on your gardening bucket list!
Materials and Tools Needed for a DIY Aeroponic Tower
Building an aeroponic tower is an enjoyable project that you can undertake in your own backyard. Before you start, however, it’s essential to gather all the necessary tools and materials to ensure a smooth building process. Let’s assume you want to grow 20 plants in the tower. Here are the key items you will need:
Materials:
- PVC pipes (4 to 6-inch diameter): These will form the main structure of your aeroponic tower. You’ll need enough length to create your desired height.
- 20 net pots (3-inch size): These pots hold your plants within the PVC pipe and allow them to receive the nutrient spray. The number can vary based on your design.
- 20 rockwool cubes: Rockwool serves as a medium for your plant roots to anchor in. Each plant starts in its own cube.
- Air pump: This moves air into the water reservoir, ensuring that your nutrient solution remains oxygenated for optimal plant health.
- Air line tubing: Tubing connects the air pump to air stones within the reservoir.
- Air stones: Placed in the reservoir, these break up bubbles from the air pump into smaller bubbles, increasing oxygenation.
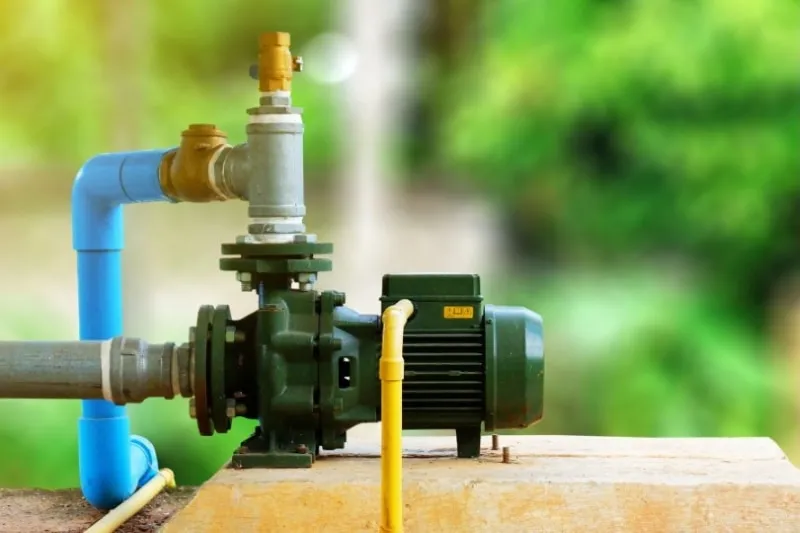
- Water pump: The water pump circulates your nutrient solution from the reservoir and up into your PVC tower where it’s sprayed out onto the roots of your plants. It has to be rated for the pressure you want to mist the roots with. So what pump for aeroponics is best? Choose from one of our picks!
- Hoses or tubing: Vinyl or silicone food-grade tubing will move the nutrient-rich water from the reservoir all the way through to the top of the tower. The diameter of the tubing needs to match the pressure of the water pump.
- Spray nozzles: Attached inside of the PVC pipes, these spray nutrient solution directly onto plant roots.
- Plastic reservoir/tank (20 to 45-gallon): This holds your nutrient solution as well as both pumps. It needs to be large enough that it doesn’t run dry between refills.
- Nutrient solution: Blended with water in your reservoir, this provides all necessary nutrients for plant growth.
Tools:
- Drill with hole saw attachment (3-inch size for pots and smaller size for spray nozzles): A drill is vital for creating holes in which you’ll place net pots and spray nozzles. Hole saw attachments ensure clean, properly-sized openings.
- Tape measure: Ensuring proper spacing between holes on your PVC will lead to better overall plant health and system stability.
- Miter Saw: Essential for cutting your PVC pipes to their required lengths. Note: If you’re not comfortable using a miter saw, most hardware stores can cut these down for you when purchased.
- Sandpaper: This comes in handy when smoothing out any rough edges after cutting or drilling into the PVC pipe.
- Rubber mallet: Useful when assembling parts together tightly.
Lastly, remember you’ll also need some plants or seeds to get started with your DIY vertical aeroponic tower garden! Whether you choose lettuce, herbs, strawberries or something else is entirely up to you.
How To Build An Aeroponic Tower Garden
Now that you’ve gathered everything you need, it’s time to build your DIY aeroponic tower garden! This process may involve some labor, but the result is worth it. Here’s a step-by-step guide explaining how to build, maintain, and monitor your aeroponic tower garden.
Step 1: Building the Structure
The first step involves building the actual tower structure. Drill holes in your PVC pipe at even intervals where you will be able to insert net pots that hold your plants. Make sure you leave adequate spacing between them to allow each plant to grow without being crowded out. Use sandpaper to remove any rough edges from the cuts.
Step 2: Assembling the Reservoir and Pump
Now it’s time to set up the reservoir tank and water pump at the base of your structure. The reservoir will also catch water runoff. The pump will move nutrient-rich water in the form of a mist from the reservoir through your piping system and out of the spray nozzles to nourish your plants’ roots.
Install the water misting pump in the reservoir and connect it to your PVC tower using hoses or tubing suitable for high-pressure systems. Attach the spray nozzles to the tubing at regular intervals inside the tower so that they can spray water periodically onto the roots of your plants.
It’s recommended to connect your pump to an electrical timer so it cycles on and off throughout the day based on the best growth cycle for your plants. Find out more from our guide on maintaining an optimal misting frequency in aeroponic gardening.
Connect everything together – insert the PVC pipe into the reservoir so all excess water can be recycled by being pumped back up top again via the misting system. Fill up the reservoir with water and turn on the system to test it, ensuring all parts work together efficiently without leaks or overflow problems.
Step 4: Preparing the Nutrient Solution
The aeroponic delivery method guarantees that your plants receive all necessary nutrients in the exact proportions they need, leading to faster growth and healthier plants. Remember, while no soil is involved in an aeroponic tower garden setup, “soil nutrients” like nitrogen, phosphorus, and potassium are still absolutely critical for plant growth – they’re just delivered through water instead.
Preparing the nutrient solution can be done by mixing water with a high-quality fertilizer specifically designed for hydroponic or aeroponic systems. For an organic approach, consider using organic fertilizers which can offer a broad spectrum of essential nutrients that plants need.
Once you’ve prepared your nutrient solution, it’s time to install it into your aeroponic tower garden.
Step 5: Oxygenating Your Water Supply
Oxygenate your water supply by ensuring there’s enough turbulence within your system created by sprays or air stones; this promotes healthy root growth due to increased oxygen availability in nutrient solution.
Step 6: Planting Your Herbs and Strawberries
Now you can place plants in their new home! Use Rockwool cubes or similar material to hold plant roots in place within each hole while allowing them space to grow downwards toward the nutrient-rich mist below. Add some life to your aeroponic tower by planting herbs such as basil or mint or fruits like strawberries.
Step 7: Monitoring Temperature and pH and Managing the Nutrient Solution
After planting, it’s important to monitor temperature conditions since different plants thrive under varied temperatures. More so, regular checking and adjusting of pH levels is crucial because if pH levels fall outside of ideal ranges (typically between 5.5-6.5), nutrient absorption can be affected negatively.
Step 7: Regular Maintenance
Regular maintenance involves cleaning out filters if any are present in order to prevent blockage affecting spray efficiency which could jeopardize plant health through inadequate nutrient delivery. Make sure that mist is being produced consistently from all nozzles.
Finally, always remember that gravity is on your side in this setup! As you mist the roots hanging in mid-air with nutrient-rich water, gravity pulls excess moisture down into the reservoir for recycling – making this system not only effective but very efficient as well!
Related: Want to know how to build a homemade vertical hydroponic garden that’s not aeroponic? Find out now!
Plant Selection and Germination
The first step in building an aeroponic tower garden is selecting the appropriate plants and successfully germinating their seeds. Your goal should be to choose a variety of plants that will yield a balanced and diverse harvest.
Starting with vegetables, lettuce and spinach are excellent choices due to their high yield and compatibility with the aeroponic system. These leafy greens can provide a steady supply of fresh produce for your salads or cooking needs.
Tomatoes, on the other hand, are not only great for salads but also for canning, making sauces, or simply eating fresh off the vine. They’re slightly more challenging to grow but worth the effort given their versatility in the kitchen.
Strawberries are another favorite choice for tower gardens as they offer delicious fruits while also adding visual appeal with their bright red color against the lush green backdrop.
Speaking of visual appeal, don’t forget about flowers! They add beauty to your tower garden while attracting pollinators which can help increase your produce yield overall.
Herbs like basil, parsley, rosemary, thyme, etc., are relatively easy to grow in such a system and can really enhance your culinary adventures at home.
Once you’ve selected your variety of seeds (lettuce, spinach, tomatoes, herbs, strawberries), it’s time to start the germination process. Seeds typically require a specific set of conditions – warmth, moisture and sometimes light – to begin developing into seedlings.
Rockwool cubes make an ideal medium for this stage due to their ability to retain water while still providing enough air space for roots to breathe. By placing each seed into its own rockwool cube and maintaining optimal temperature and moisture levels within a propagation tray or similar setup under indoor lighting conditions you’ll soon witness germination taking place!
After successful germination (usually after 1-3 weeks depending on species: faster for lettuce & spinach; slower for tomatoes & strawberries), these young seedlings are then ready to be transplanted into your aeroponic tower garden setup where they’ll continue growing until maturity – giving you a bounty of vegetables, fruits, herbs, and flowers!
Setting Up the Pump and Timer System
Building an aeroponic tower garden requires an efficient water delivery system. The heart of this system lies in a pump, specifically a submersible pump, and a timer. Together, these two components control the flow and frequency of nutrient-rich water to your plants.
A submersible pump is used due to its ability to operate underwater without overheating or malfunctioning. It helps in sending the nutrient-rich solution from the reservoir up through the system to reach your plants.
- Choosing Your Submersible Pump: The size of your pump depends on your garden tower’s size, but generally you should aim for a pump that can move half of your tank volume every minute. This ensures that all plants get enough nutrients.
- Installing Your Submersible Pump: Place it at the bottom center of your tank to allow for maximum efficiency. Connect one end of flexible tubing to it while ensuring the other end can reach up to distribute water within the tower.
The timer plays an equally essential role as it regulates when and how often the pump operates based on pre-set intervals you decide upon according to your plants’ needs.
- Choosing Your Timer: Look for a digital timer with multiple programming options for flexibility in scheduling watering intervals.
- Setting Up Your Timer: Connect it directly to your power source then plug in your submersible pump into the timer outlet. Set the timing intervals depending on plant species; leafy greens may need more frequent cycles than fruiting plants.
And that’s it! With these two key components set up correctly, you have made significant progress toward building a successful aeroponic tower garden! Remember, fine-tuning is part of the process – observe how well your system works and adjust accordingly for healthy plant growth.
Planting and Support
After setting up the structure of your tower garden, it’s time to move on to the “Planting and Support” stage. This is an essential phase as it involves the actual process of adding plants to the aeroponic system.
We begin with net pots or net cups, which are small containers with open structures designed for hydroponic systems. An important point here is that these cups should be compatible with your tower system in terms of size for optimal growth.
Before planting, you need to choose suitable plants for your tower garden. Basil and other leafy greens are particularly well-suited for an aeroponic tower due to their light requirements and size. These herbs enjoy ample light, grow relatively fast, and don’t take up too much space – making them perfect candidates.
To plant these herbs or leafy greens, take the seedlings and gently place them into the net cups while ensuring their roots are free. Once planted, these cups should then be inserted into your tower’s holes.
Aside from planting, support also plays a critical role in maintaining a healthy aeroponic tower garden. This includes both physical support to hold up growing plants and nutritional support through proper watering.
Dealing with Pests and Diseases
Even in a controlled environment like an aeroponic tower garden, your plants aren’t completely safe from the clutches of pests and diseases. Understanding how to address these issues is crucial for maintaining a healthy, thriving garden.
In the world of gardening, pests are any creatures that can cause damage to your plants. These can range from tiny insects like aphids and spider mites to larger critters such as birds and rodents. Diseases, on the other hand, often manifest as fungi, bacteria, or viruses that harm plant health.
When dealing with pests, early detection is key. Regularly inspect your plants for signs of damage or infestation – yellowing leaves, discolored spots or wilting could be indicators of pest activity. Once identified, there are many organic methods you can use to combat them. For instance:
- Insecticidal soaps: An effective solution against soft-bodied insects like aphids.
- Neem oil: A natural deterrent against various pests.
- Diatomaceous earth: A substance deadly to insects but harmless to humans and pets.
If confronted with diseases in your tower garden , it’s important first to identify the cause. Look for symptoms such as leaf discoloration, stunted growth or unusual looking growths on the plant. Here are some common solutions:
- Bio-fungicides: These help control a slew of fungal and bacterial diseases.
- Copper sprays: Copper is an excellent fungicide and bactericide.
- Crop rotation: If specific plants consistently get sick, consider rotating them with different species to break disease cycles.
Remember that prevention is always better than cure. Providing optimal growing conditions – correct light intensity, appropriate nutrient levels, proper air circulation – will go a long way in preventing pests and diseases from taking hold in your aeroponic tower garden.
Maximizing Crop Yield and Efficiency
Maximizing crop yield in small spaces or even on balconies is an art that can be perfected with aeroponic tower gardens. These innovative hydroponic systems are designed to make the most out of every inch of space they occupy, making them ideal for urban gardeners with limited room.
Making the Most Out of Every Inch
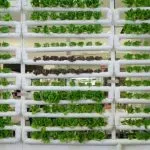
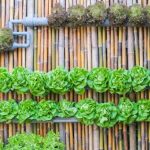
One of the key advantages of aeroponic tower gardens is their vertical design. Traditional horizontal gardens can only grow as many plants as they have surface area. But a vertical garden grows upwards, potentially doubling or tripling your crop yield in the same amount of space.
This makes tower gardens perfect for small spaces like balconies or patios, allowing you to grow more plants per square foot than traditional gardening methods. Whether you’re growing herbs, vegetables, or flowers, you’ll be able to harvest more produce from your balcony garden than ever before.
Using Hydroponic Systems To Improve Efficiency
Hydroponic systems are at the heart of any successful aeroponic tower garden. These systems use nutrient-rich water instead of soil to feed plants, providing them with exactly what they need when they need it. This not only speeds up plant growth but also improves plant health and crop yield.
In addition to improving efficiency, hydroponic systems also reduce waste by using less water than traditional gardening methods. They also eliminate the need for harmful pesticides and herbicides since there’s no soil for weeds or pests to thrive in. So not only will your plants grow faster and healthier in a hydroponic system, but you’ll also be doing your part to protect the environment.
In conclusion, if you want to maximize your crop yield and efficiency in small spaces or on balconies, an aeroponic tower garden should be at the top of your list. Its unique vertical design and use of hydroponic systems will allow you to get more out of your gardening efforts while minimizing waste and helping the environment.

