A seedling heat mat is a valuable tool for plant propagation that provides controlled extra warmth to create optimal conditions for seed germination and seedling growth. They are especially helpful for gardeners who live in regions with shorter growing seasons or cooler climates. By providing consistent and gentle heat, seedling warming mats can significantly enhance the success rate of starting seeds and promote healthy plant development. Plus, using one of these can help you save time and money by reducing the need for additional lighting or heating equipment.
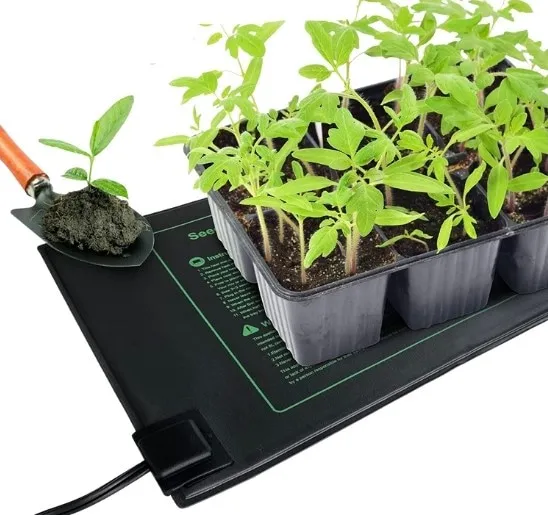
While these are a great tool for any gardener, they do require some careful attention and monitoring. So we’re here to show you how to use a seedling heat mat the right way and how long to use a heat mat for seedlings. It’s important to choose the right size and wattage for your needs and to be mindful of the temperature and moisture levels in your growing environment. With a little bit of practice and patience, you can use a seedling heat mat to help your plants thrive and get the most out of your garden this season.
Do You Need A Heat Mat For Seedlings?
Do seedling heat mats work? The answer depends on a few factors. If you live in a cooler climate or are starting your seeds early in the season, a heat mat can provide a consistent source of warmth that can help your seeds germinate faster and more reliably. However, if you live in a hot climate or are starting your seeds later in the season, a heat mat may not be necessary and could even be detrimental if the temperature gets too high.
It’s important to consider your specific growing conditions and do some research before investing in a heat mat for your seedlings. If you’re starting seeds for hydroponics and want to grow produce all year round, using a seedling heat mat helps you speed up and control the early growth stages.
Let’s explore the purpose and benefits of using a seedling heat mat in more detail.
Enhanced Germination
One of the primary benefits of using a seedling heat mat is that it promotes faster and more uniform germination. The gentle heat applied to the seeds stimulates the metabolic activity within them and helps to break dormancy, speeding up the germination process and ensuring a higher germination rate.
Improved Root Development
They create an environment that stimulates root growth. By maintaining an optimal temperature range, usually between 70°F to 85°F (21°C to 29°C), the heating pad encourages the roots to develop and expand more efficiently. This robust root system sets a strong foundation for the plant’s overall growth and vitality.
Consistent Temperature Control
Temperature plays a critical role in seed germination and early seedling growth. A seedling heating pad provides a controlled and consistent heat source, eliminating temperature fluctuations that can hinder germination. This stability allows seeds to receive the optimal warmth they need to sprout and develop into healthy seedlings.
Extended Growing Season
They enable gardeners to start seeds earlier in the season, extending the growing period and giving plants a head start. By providing warmth when ambient temperatures are still cool, you can jump-start your gardening season and enjoy an abundant harvest.
Versatility
They are versatile and can be used for various types of seeds, including vegetables, herbs, flowers, and even tropical plants. Whether you’re starting seeds indoors or in a greenhouse, a heat mat can accommodate a wide range of plant species and ensure consistent germination across different varieties.
Ease of Use
They are designed to be user-friendly. They are typically waterproof and easy to clean, ensuring a safe and hassle-free experience. With their plug-and-play functionality, you can quickly set up a heating mat by placing it on a flat surface and connecting it to a power source.
Using a seedling heat mat provides several advantages that contribute to successful seed germination and healthy plant development. In the following sections, we will explore the step-by-step process of using a seedling heat mat, including selecting the right mat, preparing the setup, and monitoring temperature and moisture levels. By following these guidelines, you can optimize your seed starting process and give your plants the best possible start to their journey toward growth and productivity.
What Is A Seedling Heat Mat
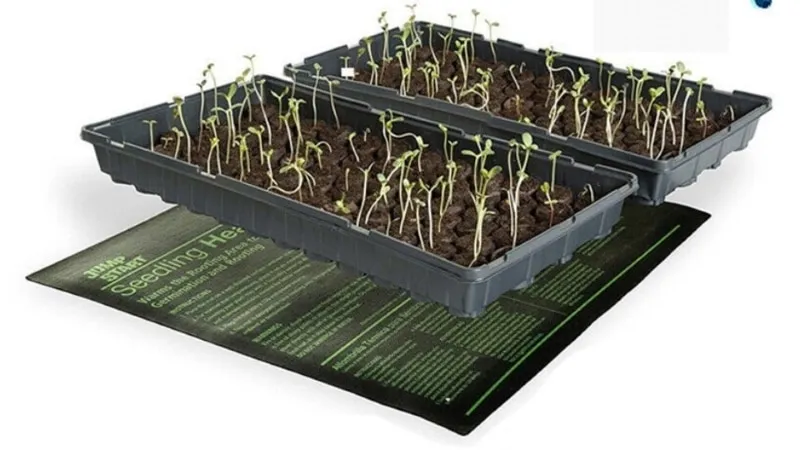
A seedling heat mat, also known as a propagation mat or germination mat, is an electrically powered mat that emits gentle heat to raise the temperature of the soil or other growing medium that seeds or seedlings are planted in. It is typically made of a durable and waterproof material and comes in various sizes to accommodate different gardening needs.
They distribute heat uniformly across their surface, ensuring that the entire seed tray or pots receive consistent warmth. This promotes even germination and eliminates cold spots that could hinder seed development. This also eliminates temperature differentials that can lead to uneven growth rates among seedlings.
Most mats feature adjustable temperature controls, allowing you to set the desired warmth suitable for the seeds you’re germinating. This flexibility enables you to meet the specific temperature requirements of different plant varieties, ensuring optimal growth conditions.
They are designed to be energy-efficient, consuming minimal electricity to maintain the desired temperature range. They are designed to be left on for extended periods, ensuring the constant warmth required for successful seed germination without significantly increasing your energy consumption.
Step-by-Step Guide: Using a Seedling Heat Mat
In this step-by-step guide, we will walk you through the process of using a seedling heat mat to maximize your chances of success.
1. Selecting the Right Seedling Heat Mat
Choosing the appropriate seedling heat mat is important for creating the ideal environment for your plants. Consider the following factors when making your selection:
Size: Determine the size of the mat based on the number of seed trays or pots you plan to use. Ensure that the mat can accommodate all your containers comfortably.
Temperature Control: Look for a mat that offers adjustable temperature settings. This feature allows you to customize the heat levels according to the specific requirements of different plant species. Additionally, consider the specific needs of your plants and the type of propagation you are undertaking. Some plant species may require higher or lower temperatures, so choose a heat mat that can meet those requirements.
Durability: Opt for a heat mat made from high-quality materials that can withstand prolonged use. Check for product reviews and ratings to ensure its durability and reliability.
The VIVOSUN 10″x20.75″ Seedling Heat Mat and Digital Thermostat Combo Set is a complete kit that you can plug in and start using.
VIVOSUN 10″x20.75″ Seedling Heat Mat and Digital Thermostat Combo Set
This concise hydroponics guide covers:
- Introduction to Hydroponics
- Hydroponic Growing Mediums
- Types of Hydroponic Systems
- Plant Nutrition and Lighting
- Growing Process and Creating Your Own Systems
- Crops Suited to Hydroponic Gardening
2. Preparing the Setup
Before placing the seedling heat mat, it’s essential to prepare the setup properly. Follow these steps:
Ideal Location: Select a flat surface for placing the mat. It should be away from direct sunlight and drafts to prevent temperature fluctuations. A sturdy table or countertop works well.
Surface Cleaning: Thoroughly clean and sanitize the surface where you will place the heat mat. Remove any debris, dust, or potential contaminants to create a clean and hygienic environment for your seeds.
3. Placing the Seed Trays or Pots
Proper placement of seed trays or pots on the heat mat ensures optimal heat distribution and air circulation. Here’s what you need to do:
Container Selection: Choose suitable containers for your seeds, such as seed trays, pots, or plug trays. Ensure they have proper drainage holes to prevent waterlogging.
Growing Medium: Fill the containers with a well-draining growing medium, such as seed starting mix or a blend of peat moss and vermiculite. This provides the ideal conditions for seed germination and seedling growth.
Arrangement: Place the seed trays or pots on the mat, ensuring adequate spacing between them. This allows air to circulate freely around each container, preventing excessive moisture buildup and promoting healthy growth.
4. Connecting and Adjusting the Heat Mat
Now it’s time to connect the pad and adjust the temperature settings for optimal results. Follow these guidelines:
Connection: Plug the provided cord of the heat pad into a power source. Ensure that the mat is securely connected and positioned on a flat surface.
Temperature Settings: Refer to the manufacturer’s instructions to adjust the temperature settings on the heat mat. Consider the temperature requirements of your specific plant species. Aim for a temperature that promotes healthy germination and seedling development.
5. Monitoring and Care
Regular monitoring and proper care are crucial to ensure the success of your seedlings. Pay attention to the following:
Temperature Monitoring: Use a thermometer to monitor the temperature on the heat mat regularly. Adjust the settings if necessary to maintain the desired temperature range for your plants.
Moisture Levels: Maintain proper moisture levels in the seed trays or pots. Consider using a humidity dome or misting the containers to create a humid environment that promotes seed germination. Be careful not to oversaturate the soil.
6. Tracking Progress and Maintenance
A seedling heat mat can significantly enhance the germination and growth of your plants. To ensure optimal results and long-term effectiveness, it’s important to track the progress of your seedlings and maintain the heat mat properly. Here are some key points to consider:
Keeping a Record of Progress: It’s essential to keep a record of your seedlings’ progress, including important milestones and germination rates. By documenting this information, you can track the success of your seedlings and identify any patterns or trends so that future batches of plants become more predictable in their growing cycles.
Record the date of sowing, the number of seeds planted, and the germination rate. As your seedlings grow, note down their growth milestones, such as the appearance of true leaves or the development of a strong root system. This record-keeping will help you evaluate the effectiveness of the heat mat and make adjustments if necessary.
Regular Cleaning and Maintenance: Proper maintenance of the seedling heat mat is crucial to ensure its optimal performance and longevity. Regularly clean the heat pad by wiping it gently with a damp cloth to remove any dirt or debris. Avoid using harsh chemicals that could damage the mat. Additionally, inspect the heat mat regularly for any signs of wear or damage. Check the power cord for any fraying or exposed wires, and ensure that the mat is functioning properly. If you notice any issues or damage, discontinue use and replace the mat to prevent any safety hazards.
Ensuring Safety: While using a seedling heat pad, it’s important to prioritize safety. Avoid placing the heat mat near water sources or in areas where it can come into contact with moisture. Always follow the manufacturer’s instructions and guidelines for safe usage. Unplug the mat when not in use and never leave it unattended for an extended period. By taking these safety precautions, you can prevent accidents and maintain a secure growing environment for your seedlings.
When To Remove Seedlings From Heat Mat
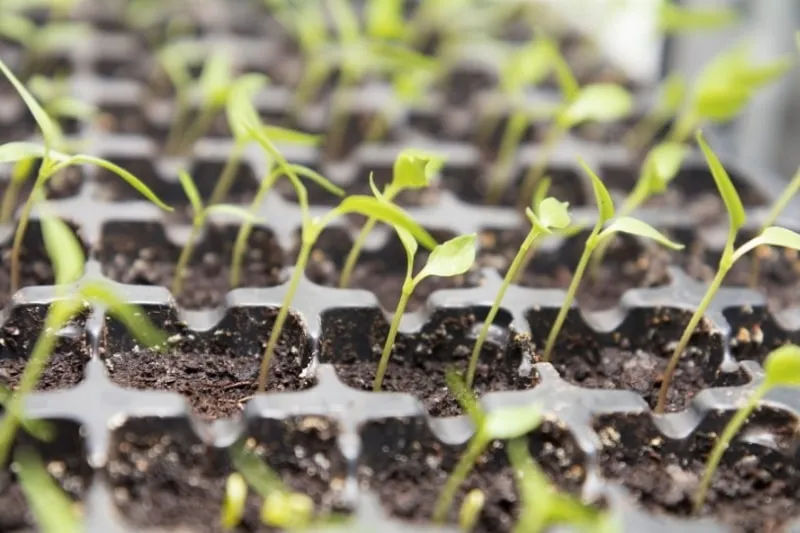
Seedlings should be removed from the heat mat when they have developed their first true leaves. The first leaves that appear after germination are called cotyledons and are part of the seed itself. The true leaves are the second set of leaves that emerge and are specific to the plant species. Once the true leaves have emerged, the seedling is established enough to be moved to a cooler location without the need for the heat mat. At this point, they’re also ready to be transplanted into your hydroponic system.
This is typically around 2-3 weeks after germination, but the exact timing may vary depending on the plant species and growing conditions. It’s important to monitor the temperature and moisture levels of your growing environment and gradually acclimate your seedlings to cooler temperatures to prevent shock or stress.


