In a Nutrient Film Technique (NFT) hydroponic system, a thin film of nutrient-rich water continuously flows over the roots of the plants, providing them with the necessary nutrients and oxygen. This hydroponic technique offers several advantages over traditional soil-based gardening but there are several components that are necessary for the system to work properly.
If you know how to build a NFT hydroponic system the right way, you can ensure the success of your hydroponic gardening endeavors. A well-designed and constructed NFT system provides the optimal environment for plants to thrive and maximize their growth potential. By understanding the basics of NFT and following the right steps, you can create a productive and efficient hydroponic setup in your own home or garden.
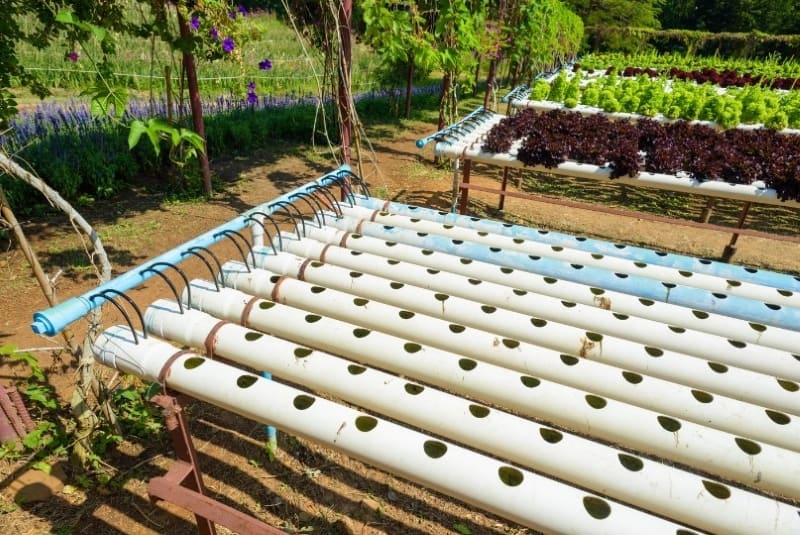
In the following sections, we will delve deeper into the key components and steps involved in building a NFT hydroponic system. From planning and designing to installing the necessary equipment, this article will guide you through the process of DIY NFT hydroponics, enabling you to create a functional and effective NFT system for your plants. So let’s get started and explore the world of NFT hydroponics!
How To Build A NFT Hydroponic System: A Step-by-Step Guide
1. Plan and Create an NFT Hydroponic System Design
Before diving into the construction of your NFT hydroponic system, it’s crucial to thoroughly plan and design the setup. Taking the time to consider various factors will help ensure a successful and efficient system. Here’s a step-by-step guide to help you with your hydroponics NFT system plans:
1. Assess Available Space: Begin by evaluating the space you have for your NFT system. Consider both the physical area and the height available for vertical setups. This assessment will determine the size and number of channels you can accommodate. Remember to leave ample room for easy access and maintenance.
2. Select Suitable Plants: The choice of plants plays a significant role in designing your NFT system. Consider the specific requirements of each plant, such as light intensity, temperature, and growth habits. Some of the best plants for an NFT system may not grow that easily in another system, while some plants thrive in NFT systems but others may require a different hydroponic method like deep water culture. Choose plants that are compatible with the nutrient film technique and align with your goals and preferences. Small plants typically work better than larger plants.
3. Nutrient Requirements: Understand the nutrient needs of the selected plants. Different plants have varying nutrient requirements at different stages of growth. Ensure you have a clear understanding of the essential elements your plants need and how to provide them in the nutrient solution. This knowledge will guide you in designing an efficient nutrient delivery system.
4. Layout Design: Now it’s time to design the layout of your NFT system. Determine the number and size of channels based on the available space and the number of plants you intend to grow. Allow for proper spacing between channels to avoid overcrowding and provide enough room for plant growth. It’s recommended to start with a smaller setup if you’re new to hydroponics. A simple, linear design with a single nutrient reservoir is the best NFT hydroponics for beginners
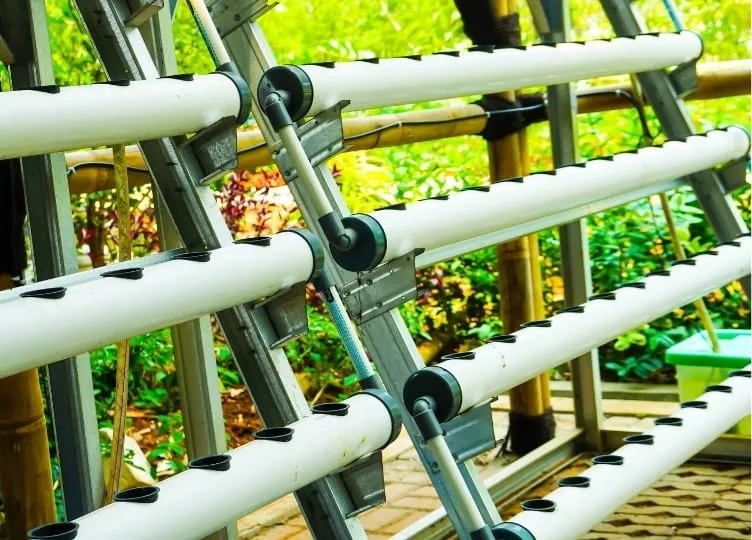
5. Reservoir Placement: Decide on the location and size of the nutrient reservoir. It should be easily accessible for regular maintenance and nutrient solution replenishment. The reservoir should be placed at a level lower than the channels to allow gravity to assist in the nutrient flow. Ensure it has a cover or lid to prevent evaporation and contamination.
6. Plumbing System: Plan the plumbing system carefully to ensure proper nutrient flow throughout the channels. Use a submersible pump to circulate the nutrient solution from the reservoir to the highest point of the channels. The solution will then flow through the channels and back into the reservoir. Tubing and fittings should be adequately sized to maintain a consistent flow rate.
By following these planning and designing steps, you will be well-prepared to move on to the construction phase of your NFT hydroponic system. Take your time to ensure a solid foundation, as it will contribute to the overall success of your system and the healthy growth of your plants.
Related: In order to design the NFT hydroponics set up properly first make sure to understand how the nutrient film technique works.
2. Gathering NFT Hydroponic Supplies and Tools
In order to successfully construct a DIY NFT hydroponic system, you’ll need to gather specific materials and tools. This section will provide you with a comprehensive list of everything you’ll require.
1. Channels: Select high-quality channels that are suitable for your NFT system. PVC pipes, guttering systems, or specially designed NFT channels are commonly used. Ensure they are sturdy, durable, and have a smooth interior surface to facilitate the flow of the nutrient film.
2. Nutrient Reservoir: You’ll need a container to hold the nutrient solution for your plants. A food-grade plastic or fiberglass reservoir with a lid is recommended. Make sure it’s large enough to accommodate the volume of nutrient solution required for your system.
3. Submersible Pump: Invest in a reliable submersible water pump to circulate the nutrient solution. Look for a pump with adjustable flow settings and low power consumption. It’s crucial to choose a water pump that matches the size and flow requirements of your NFT system.
4. Tubing and Fittings: Acquire suitable tubing and fittings to connect the various components of your NFT system. Use PVC or flexible vinyl tubing with an appropriate diameter. Select fittings that provide secure connections and are resistant to leaks.
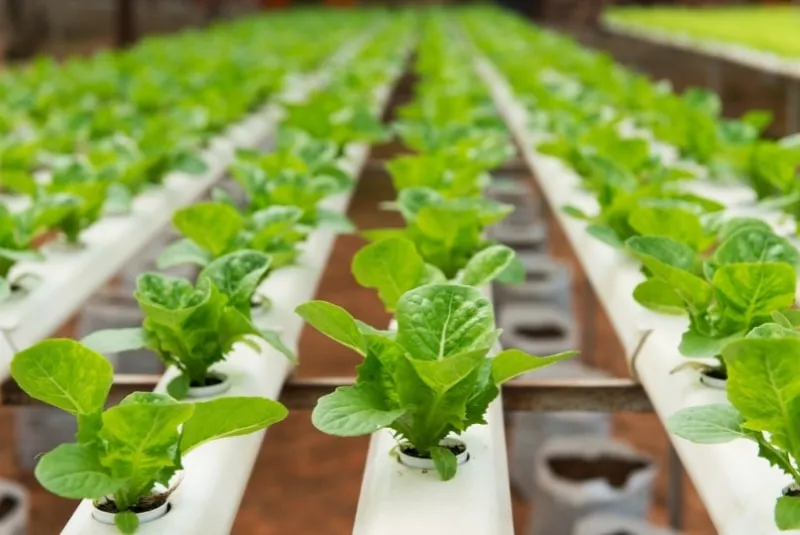
5. Growing Medium: Nutrient film technique systems typically use a growing medium to support the plant roots. Options include rockwool cubes, perlite, coconut coir, or specialized NFT grow cups. Choose a grow medium that promotes root health, drainage, and easy access for the nutrient film. Avoid a medium like peat moss where bits can break away, run down the channel and build up inside the reservoir tank. This can even clog the water pump.
6. Nutrient Solution: Procure a high-quality hydroponic nutrient solution that contains the essential elements required for plant growth. Look for a well-balanced solution formulated for the specific stage of plant growth you’re targeting. Follow the manufacturer’s instructions for proper mixing ratios.
7. pH and EC Meters: Invest in reliable pH and EC (electrical conductivity) meters to monitor and adjust the pH level and nutrient concentration of your solution. Accurate measurements are crucial for maintaining optimal growing conditions and preventing nutrient imbalances.
8. Lighting System: Depending on the location of your NFT system, you may need to provide supplemental lighting. LED grow lights are energy-efficient and offer a wide spectrum suitable for plant growth. Calculate the appropriate lighting intensity and duration based on the plant species you’re cultivating.
9. Timer: A timer is essential for automating the nutrient solution delivery and lighting cycles. Look for a programmable timer that can control the pump and lighting system according to your desired NFT watering schedule. This will ensure consistent and timely delivery of nutrients and light to your plants.
10. Miscellaneous Tools: Gather a set of basic tools for system assembly, such as a drill, screwdriver, pipe cutter, measuring tape, and marker. These tools will come in handy during the installation and setup process.
By collecting all the necessary materials and tools beforehand, you’ll be well-prepared to proceed with the construction of your NFT hydroponic system.
Note: While many NFT setups benefit from the addition of air stones and pumps, they aren’t essential. There is no need for an air pump, air stone, timers, or anything else of the kind if the water flow is kept low and the water is allowed to run continuously.
3. Building the Framework and Channels
In this section, we will guide you through the step-by-step process of assembling and setting up your NFT system, bringing you closer to enjoying the benefits of hydroponic gardening:
1. Assembling the Framework:
– You will need support material for the ends of each channel. These can be simple pieces of wood with grooves in them. Cut the support material into appropriate lengths and shapes according to your planned design. Use a saw, pipe cutter, or suitable cutting tool to achieve precise measurements for these channels.
– Connect the different components of the framework using connectors, joints, or fasteners that are appropriate for the chosen material. Secure the connections tightly to ensure stability and strength.
2. Positioning the Channels:
– Determine the desired slope for your NFT system. A recommended slope is approximately 1 inch of drop for every 10 feet of channel length. This slope facilitates the smooth flow of the nutrient film across the plants’ roots.
– Install the channels onto the framework, ensuring they are properly aligned and securely fastened. Use appropriate brackets, clips, or hangers to hold the channels in place.
– Double-check the slope of the channels by using a level or measuring the drop from one end to the other. Adjust the positioning if necessary to achieve the desired slope for optimal nutrient flow.
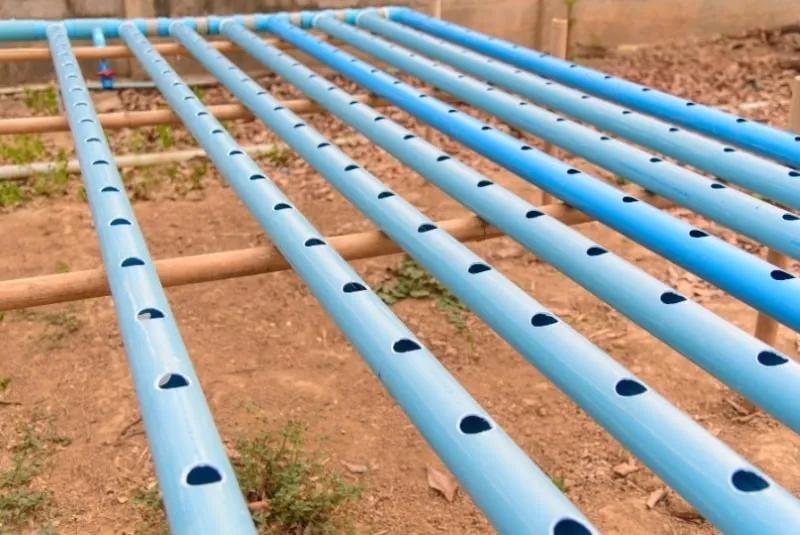
3. Securing the Channels:
– Once the channels are in place, ensure they are well-supported and stable. Avoid any sagging or excessive movement that could disrupt the nutrient flow.
– Use additional brackets, supports, or fasteners as needed to secure the channels firmly to the framework. This will prevent any potential damage or displacement, especially when the nutrient solution starts flowing. Install end caps or plugs to prevent leakage and ensure the channels are watertight.
By following these steps, you will successfully build the framework and install the channels for your NFT hydroponic system. The sturdy framework and properly positioned channels are essential for maintaining the structural integrity of your system and ensuring a steady and efficient flow of the nutrient film.
4. Installing the Plumbing System
In this section, we will delve into the important step of installing the plumbing system for your system. Properly setting up the plumbing system ensures a balanced flow of nutrient solution through the channels, which is essential for the health and growth of your plants.
1. Connecting the Nutrient Reservoir:
– Position the nutrient reservoir near your NFT system for convenient access and for the collection of excess nutrient solution from the end of the system’s channels. Ensure it is placed securely to prevent any accidental spills or damage.
– Connect a length of tubing from the nutrient reservoir outlet to the inlet of the nutrient pump. Use appropriate connectors, such as barbed fittings or threaded adapters, to create a watertight connection.
2. Setting Up the Pump:
– The water pump should be placed in the water reservoir. The pump is responsible for circulating the nutrient-rich water through the tubing and up into the NFT channels. The water is then allowed to flow over the roots of the plants before draining back into the reservoir via a nutrient return pipe. It’s important to ensure that the nutrient pump is powerful enough to deliver a consistent flow of water to the plants and that the tubing is properly connected to prevent leaks. Additionally, it’s recommended to install a timer to control the pump’s on and off cycles, as this can help to prevent over-watering and ensure that the plants receive the right amount of water and nutrients.
3. Installing Tubing and Achieving Balanced Flow:
– Measure and cut the tubing to appropriate lengths, ensuring it reaches from the pump outlet to the end of each channel. Use a sharp cutting tool to achieve clean and precise cuts.
– Connect the tubing to the outlet of the pump and the inlets of each channel. This is typically where the nutrient film begins to flow down the channels. Secure the connections using suitable connectors or clamps to prevent any leaks or disconnections.
– Ensure a balanced flow of nutrient solution by maintaining an equal distribution of the solution to each channel. Use flow control valves or adjust the pump’s flow rate to achieve consistent flow across all channels.
4. Checking for Leaks and Adjusting Flow:
– Before starting the pump, carefully inspect all connections and joints for potential leaks. Tighten any loose fittings or replace damaged components as necessary.
– Once the plumbing system is set up and all connections are secure, switch on the pump and observe the flow of the nutrient solution. Ensure that the solution is evenly distributed across the channels and that there are no significant fluctuations or blockages.
– Monitor the flow and make necessary adjustments to achieve a balanced flow rate throughout the channels. This will ensure that each plant receives an adequate amount of nutrient solution.
By following these steps, you will successfully install the plumbing system for your NFT hydroponic system. The well-connected nutrient reservoir, pump, and tubing will work together to maintain a balanced flow of nutrient solution through the channels.
5. Sealing and Testing
In this section, we will focus on the steps of sealing all connections and testing your NFT system. Proper sealing ensures that the system is leak-free, and conducting a thorough test helps ensure its proper functioning.
1. Importance of Sealing Connections:
– Sealing all connections within your NFT system is vital to prevent any leaks or nutrient solution loss. A leak-free system ensures the optimal distribution of nutrients to your plants and maintains the efficiency of the hydroponic setup with no wastage of precious water and nutrients.
– Inspect each connection point, including tubing joints, fittings, and any other interfaces. Ensure that all connections are tightly secured and there are no visible gaps or signs of leakage.
– Use appropriate sealing materials, such as Teflon tape or thread sealant, to enhance the tightness and reliability of threaded connections.
2. Conducting a Thorough System Test:
– Before introducing your plants to the NFT system, you should conduct a comprehensive test to ensure everything is functioning as expected. This test will help identify any potential issues or malfunctions that need to be addressed before the system becomes operational.
– Fill the nutrient reservoir with the appropriate nutrient solution, following the manufacturer’s instructions or your preferred nutrient recipe.
– Switch on the pump and observe the flow of the nutrient solution through the channels. Ensure that the solution reaches the end of each channel and returns to the reservoir without any obstructions or deviations.
– Monitor the flow rate and check for any signs of leaks or drips at connection points. Pay close attention to the stability of the nutrient film and its uniform distribution across the roots of the plants.
– Verify that the slope of the channels is optimal for the smooth flow of the nutrient solution. Adjust the angle if necessary to ensure proper drainage and avoid any stagnant areas.
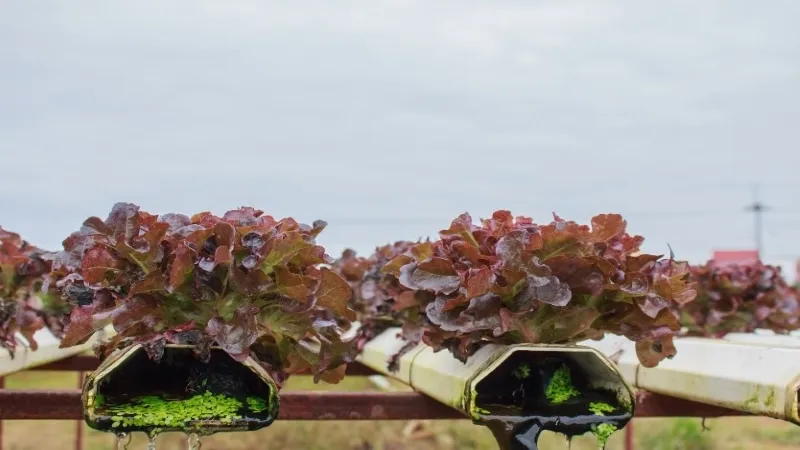
3. Troubleshooting and Adjustments:
– If you encounter any leaks during the testing phase, promptly identify the source and take corrective action. This may involve tightening connections, replacing faulty components, or resealing interfaces.
– Monitor the system for an extended period to ensure its stability and reliability. Observe the nutrient solution levels, flow rate, and overall performance to confirm that the NFT system functions optimally.
By following these steps, you will effectively seal all connections within your NFT hydroponic system and conduct a thorough test to ensure its proper functioning. A leak-free and well-tested system will provide a stable and efficient environment for your plants to thrive.
6. Nutrient Solution and Planting
Now, we will focus on the steps of preparing and maintaining the nutrient solution in the reservoir and selecting and planting suitable hydroponic plants in the NFT (Nutrient Film Technique) channels of your hydroponic system.
1. Preparing the Nutrient Solution:
– Start by selecting a high-quality hydroponic nutrient solution that is specifically formulated for the type of plants you intend to grow. Different plants have varying nutrient requirements, so choose a solution that provides the necessary elements for their optimal growth.
– Follow the manufacturer’s instructions to mix the nutrient solution accurately. Pay attention to the recommended concentrations and ratios of nutrients. It is crucial to achieve the right balance of essential elements to support healthy plant growth.
– Monitor and adjust the pH level of the nutrient solution as per the requirements of your selected plants. Most hydroponic plants thrive in a slightly acidic pH range of 5.5 to 6.5. Use a pH testing kit and adjust the solution using pH up or pH down solutions accordingly.
2. Maintaining the Nutrient Solution:
– Regularly monitor the nutrient solution’s pH level and adjust it if necessary. Fluctuations in pH can affect nutrient availability and plant health. Aim to maintain a stable pH level within the optimal range for your plants.
– Keep an eye on the nutrient solution’s temperature. Ideally, it should be warm water and within the range recommended for the specific plants you are growing. Maintain a temperature that promotes healthy nutrient uptake and prevents the growth of harmful microorganisms.
– Check the nutrient solution’s level and replenish it as needed. Plants absorb water and nutrients from the solution, so maintaining the appropriate level ensures a consistent supply of nutrients to the plant roots.
3. Selecting and Planting Hydroponic Plants:
– Choose plants that are well-suited for hydroponic cultivation and are compatible with the NFT system. Leafy greens, herbs, and some fruiting crops like strawberries and tomatoes are popular choices for NFT hydroponics.
– Consider the space available in your NFT channels and select plants that fit well within the system’s dimensions. Avoid overcrowding to ensure each plant has sufficient access to nutrients and light.
– Plant seedlings or young plants in rockwool cubes, net pots, or other suitable growing media. Gently place the plants into the openings of the NFT channels, making sure their roots are in contact with the nutrient film.
– Secure the plants in place using appropriate support mechanisms like clips or foam inserts to prevent them from shifting or falling out of the channels.
By following these guidelines, you will be able to prepare and maintain the nutrient solution in your NFT hydroponic system and select and plant suitable hydroponic plants in the NFT channels. This will lay the foundation for healthy plant growth and optimize the performance of your hydroponic setup.
NFT Hydroponics Kit
If all of the above steps seem too much work, there are complete NFT hydroponic system kits available to buy. Each one is a small setup so if you want to grow many plants, you will need to buy multiple kits. The costs can add up but if you’re just starting and want to just learn how to operate an NFT hydroponic system before building a large system yourself, this is a good way to go.
Lapond Hydroponic Grow Kit
- Hydroponic outdoor grow system designed for fast, convenient vegetable gardening
- Perfect for beginners with no experience needed
- Food-grade PVC-U pipes with ample space for a variety of vegetables, flowers, and plants
- Pipe diameter is 2.48”, hole size is 1.2” * 1.2”
- Water pump with timer allows for customizable intervals to go on and off
- Circulation mode can be set manually or automatically
- Extremely simple to assemble and use and easy to take care of with no arable land or weeds to clear


