I few years ago, I stumbled upon a fascinating and straightforward approach to hydroponics called the Kratky method. This technique is perfect for beginners who are looking to dip their toes into the world of hydroponics without investing in expensive equipment or complex systems. By using everyday items like mason jars, one can easily create a simple, low-maintenance hydroponic food-growing system.
What caught my attention about the Kratky method is how it promotes the growth of plants without the need for electricity, aerators, or pumps. This passive hydroponic system allows the plants to naturally absorb nutrients and water from a nutrient-rich solution in a mason jar. As the plants grow in the Kratky method mason jar, they consume the solution and create an air gap for optimal root oxygenation, leading to faster and healthier growth compared to traditional soil-based methods.
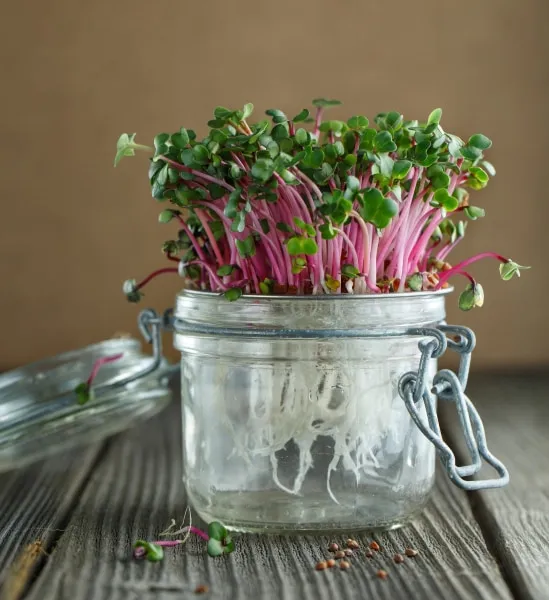
I was thrilled to learn that almost anyone can try the Kratky method with just a few cheap (or even free) materials, like wide-mouth mason jars, net pots, and nutrient solutions. This eco-friendly approach has the potential to bring hydroponics to a broader audience, helping people grow fresh produce in limited space, even if they lack a green thumb.
Kratky Method Fundamentals
Non-Circulating Hydroponics System
When I first learned about the Kratky method, I was intrigued by its simplicity. This method is essentially a non-circulating hydroponics system that doesn’t require electricity, pumps, or aerators. Sounds great, right? Let me explain a bit more about how it works.
I found out at the time that the Kratky method Mason jar is perfect for beginners like me, who want to dip their toes into the world of hydroponics. With just a few basic materials like wide-mouth mason jars, 3-inch net pots, and some water mixed with nutrients, it’s easy to create a functional little hydroponics system.
One thing I discovered about the Kratky method is that the water and nutrient solution in the jars should reach just above the bottom of the net cups if the plants are just starting out because the growing medium (hydroton or rockwool cubes) will absorb the water and nutrients, feeding them to the plant roots. Otherwise, it is better to leave about one inch of space. This process allows the plants to thrive without the need for circulating water or aerators.
As my plants grew in this simple hydroponics system, their roots extended down into the nutrient-rich water. Eventually, they consume most of the water and nutrients, and by that time, they’re usually ready for harvest.
It’s important to note that the Kratky method doesn’t work well for large or long-term plants, but it’s perfect for small, fast-growing plants like lettuce, herbs, or even small flowering plants.
Additionally, I learned that it’s crucial to use opaque mason jars or paint clear jars to prevent light from entering the root zone. Doing this will help avoid algae growth, which can be detrimental to your plants’ health.
Overall, the Kratky method mason jar technique allowed me to easily venture into hydroponics and successfully grow small plants without relying on any electricity or fancy equipment. It’s been a fun and rewarding journey so far even as I’ve adopted the more complicated methods since then, and I can’t wait to see what I’ll grow next!
What is a Kratky Hydroponics Mason Jar?
Containers and Materials for Mason Jar Hydroponics
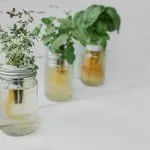
A Kratky Hydroponics Mason Jar is a simple and easy way to grow plants using the Kratky method, where I suspend the roots of the plants in a nutrient-rich water solution. While traditionally using larger containers like buckets, I find that mason jars are perfect for indoor gardening, and they add a wonderful aesthetic to my living space. To create a Kratky jar, I need a few basic materials, which are usually readily available or even repurposed.
- Mason jars: I prefer using wide-mouth mason jars for better access to the jar’s interior and easier plant maintenance. The size of the jar depends on the space available and the plants I want to grow.
- Mason jar lids: To secure the plant and ensure proper root suspension, I need mason jar lids that can support the plant’s weight and hold the growing medium in place.
- Kratky jar lids: Some people prefer to use specially designed lids with built-in net cups. These Kratky jar lids eliminate the need for using separate net pots or additional supports.
What Size Mason Jar for Kratky Method?
The size of the mason jar I use for my Kratky hydroponics depends on the specific plants I want to grow and the space available in my home. Here are a few guidelines to help me choose the right size:
- Small plants or seedlings: For growing smaller plants like herbs, lettuce, or seedlings, I use pint-sized (16 oz) mason jars. These smaller jars are easy to maintain and fit well on windowsills, countertops, or shelves.
- Medium-sized plants: For medium-sized plants like peppers, tomatoes, or larger herb varieties, I go for quart-sized (32 oz) mason jars. These provide more room for both the plant and the nutrient solution to sustain their growth.
- Large plants: I typically avoid using mason jars for large plants like cucumbers or zucchini, as they require more space for root growth and nutrient absorption. In such cases, I opt for buckets or more substantial containers.
When setting up my mason jar hydroponics DIY system, I also consider room for oxygenation, usually leaving a 1/4-1/2″ inch gap of air between the water line and the bottom of the net cup, allowing the roots to access oxygen more easily. This setup helps me maintain a healthy environment for my plants while enjoying the convenience and beauty of mason jar hydroponics.
How to Make a Kratky Jar
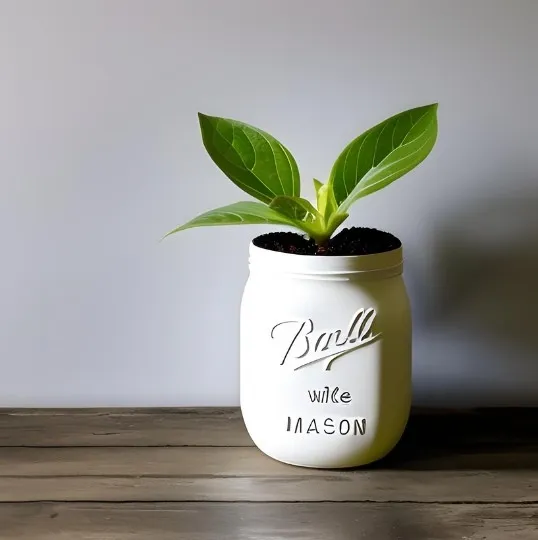
I want to share how I made my own Kratky jar. The method is simple and doesn’t require any electricity, making it an excellent choice for beginners who want to try hydroponic gardening.
First, I gathered the necessary materials:
- A wide-mouth 16 oz or 32 oz Mason Jar
- A net cup that fits into the jar’s opening
- Hydroponic nutrients
- Seedlings
- Hydroton or another growing medium
To start growing plants using the Kratky method in mason jars, I first gather my materials, including wide-mouth mason jars, preferably amber ones to prevent light from reaching the roots. If I use clear jars, I make sure to paint them or cover them to avoid algae growth. I also need 3-inch net pots to hold the plants and fit on the jar’s lip.
To begin, I removed the metal circle portion of the Mason Jar lid, keeping the metal sealing ring. I then inserted the net cup into the opening, making sure it sat securely without falling in. I screwed the top ring back in to hold everything in place. This is now a Kratky jar!
If you want an even simpler way to start, you can even get a small hydroponic mason jar kit that includes everything except the seedlings.
Growing Plants with the Kratky Method
After assembling the materials, I carefully remove the cup and fill the jars with water and the appropriate Kratky method mason jar nutrients according to the package instructions. This is typically a mixture of Masterblend fertilizer, calcium nitrate, and magnesium sulfate in a 4-18-38 ratio. If starting with a seedling, the nutrient solution should reach just above the bottom of the net cups, allowing the growing medium to absorb the nutrients and deliver them to the plant roots.
Once the nutrients were well mixed, I reinserted the net cup. I added Hydroton, a clay-based growing medium, to the net cup, leaving a small space for the seedling. Then, I carefully inserted my seedling into the growing medium, making sure its roots reached the nutrient solution.
Remember to place the jar in a spot with appropriate lighting and temperature for the specific plant. As the plant grows, it’ll absorb the water and nutrients, and the solution level inside the jar will gradually decrease.
That’s it! This DIY Kratky jar project is a fun and sustainable way to grow plants indoors without needing a complicated hydroponic system. Give it a try and enjoy your fresh greens and herbs!
Maintaining Water and Nutrient Levels
During the growing process, it’s essential to maintain the proper water and nutrient levels within the mason jars. I make sure that I don’t have to continuously add water or nutrients because the roots will grow with the water level, allowing the plant to take up oxygen effectively. In case the water runs out before my plants finish growing, I top off the jars with fresh water and nutrients.
To optimize plant growth, I place my mason jars under a grow light or on the sunniest window ledge in my house. This provides the required light spectrum for successful plant growth using the Kratky method.
Why Are My Mason Jars Cloudy?
Sometimes, I might notice my mason jars becoming cloudy, which could be due to a few reasons. If I use clear mason jars, light exposure may cause algae growth, making the jars turn greenish and cloudy. To prevent this, I make sure to use amber jars or cover or paint clear jars opaque to block the light.
Another reason for cloudy jars could be the presence of bacteria or other contaminants in the water and nutrient solution. Ensuring that I use clean water and equipment minimizes this occurrence and keeps my plants healthy throughout the growing process.

