Growing microgreens hydroponically is a rewarding endeavor that lets you enjoy fresh, nutritious greens year-round, regardless of your outdoor space or climate conditions. Microgreens are young vegetable greens that are approximately 1–3 inches tall. They are an excellent source of vitamins, minerals, and antioxidants, often containing higher nutrient levels than more mature vegetable greens. By growing them hydroponically, you tap into a method that saves space and uses water efficiently, making it a sustainable choice that can yield crops in a relatively quick time frame.
Knowing how to grow hydroponic microgreens at home begins with selecting the right seeds and preparing a suitable growing environment that includes a water source, nutrients, and proper lighting. Hydroponics is essentially a method to grow plants without soil by using a nutrient-rich water solution. This technique allows for precise control over environmental conditions, which can lead to healthier plants and potentially higher nutritional value.
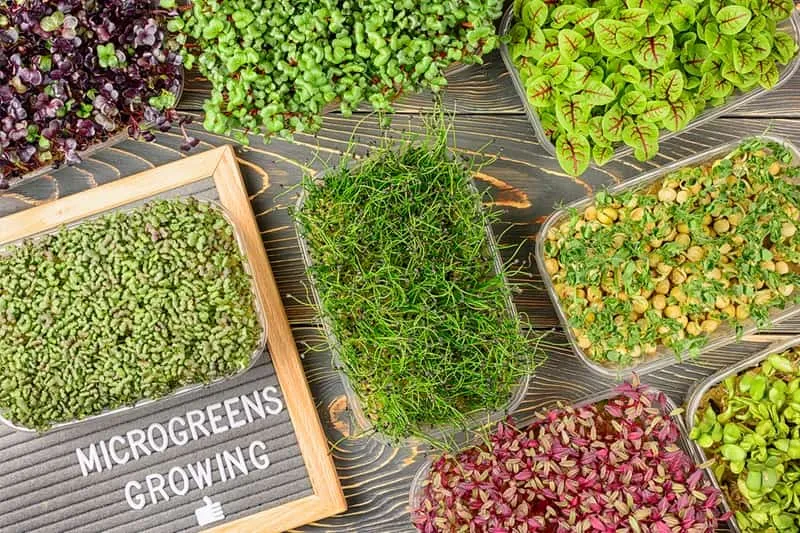
As you embark on your journey to grow microgreens hydroponically, you’ll find it’s a simple, clean, and efficient process. While soil-based growing has its benefits, hydroponics minimizes mess and reduces common soil-borne diseases and pests. You’ll be able to cultivate a continuous supply of these little greens, enhancing your meals not just with their vibrant colors and textures, but also with their rich bursts of flavor and nutrition.
Can You Grow Microgreens Hydroponically?
Absolutely! Growing microgreens hydroponically is not only possible; it’s also quite popular among gardeners looking to maximize space and minimize mess. The method involves growing microgreens without soil, using a water-based nutrient solution to provide all the nourishment your plants need. This method can lead to faster growth compared to traditional soil methods. After just a few weeks, once the first true leaves have developed, your microgreens are ready to harvest.
Related: Unsure if you want to grow microgreens in soil or hydroponics? We can help with your decision.
Getting Started with Hydroponic Microgreens
Embarking on the journey of growing hydroponic microgreens begins with understanding the essential components and steps. By starting off on the right foot, you can ensure the health and success of your microgreens from seed to harvest.
Choosing the Right Seeds
When selecting seeds for your microgreens hydroponic setup, the variety is key. Choose microgreen seeds that are known to thrive in a hydroponic system. Opt for non-treated seeds meant for sprouting, such as lettuce, kale, arugula, or basil, ensuring they’re free of pathogens.
Selecting Your Hydroponic System for Microgreens
There are several types of hydroponic systems suitable for growing microgreens, including wick systems, deep water culture, and nutrient film technique. For beginners, a simple wick system utilizing a reservoir and wick to transport water may be the easiest to manage.
- Hydroponic System Components:
- Container or tray
- Reservoir
- Pump (for certain systems)
Preparing the Hydroponic Growing Medium for Microgreens
The best hydroponic growing medium for microgreens will provide excellent moisture retention and air circulation to support the rapid seed germination and root growth of these young plants. Here are some of the most commonly used and effective mediums for hydroponic microgreens:
- Coconut Coir: This is a sustainable byproduct of coconut processing and is known for its excellent water retention and aeration properties. It’s also pH-neutral, which is ideal for growing microgreens.
- Rockwool: This inert and sterile medium is made from molten rock spun into fine fibers. It holds water well and provides a stable environment for seedling roots. However, it typically requires pre-soaking to adjust its naturally high pH.
- Vermiculite: This mineral-based medium is lightweight and can retain water and nutrients effectively. It’s often mixed with other media to improve aeration.
- Perlite: Perlite is a volcanic glass that has been heated to a high temperature to pop like popcorn. It’s often used in combination with other growing mediums to increase drainage and aeration.
- Peat Moss: Peat moss has good water retention and is often used in seed starting mixes. It’s sometimes blended with perlite or vermiculite to improve its properties for hydroponic use.
- Biostrate Felt: This is a biodegradable textile that can hold moisture and support the growth of microgreens without the need for soil. It’s designed specifically for hydroponic applications and is easy to use.
- Hemp Mats: Hemp mats are made from natural hemp fibers and are fully biodegradable. They are designed for hydroponic growing and provide a clean and sustainable medium for microgreens.
- Jute Mats: Similar to hemp mats, jute mats are made from natural jute fibers and offer a biodegradable option for growing microgreens hydroponically.
- Foam Mats: These are synthetic mats that can be reused multiple times. They provide a clean and inert environment for microgreen roots.
When choosing a growing medium for hydroponic microgreens, consider factors such as water retention, sustainability, ease of use, and cost. Some growers prefer using a mix of media to optimize both water retention and aeration. It’s also important to ensure that the medium is clean and free from pathogens since microgreens are harvested at a young stage and are often eaten raw.
Setting Up Your Grow Area
Choose a space in your home such as a countertop or windowsill where your microgreens can receive ample light. Ensure the area is stable, level, and free of contaminants. An indoor location shielded from extreme temperatures is ideal.
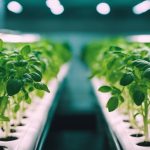
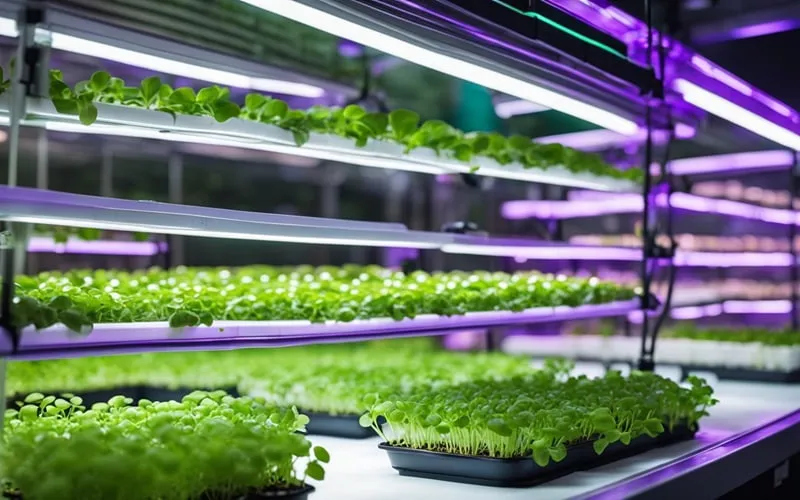
Proper lighting is crucial for the growth of microgreens. LED grow lights are a popular choice if natural light is insufficient. They provide a full spectrum of light without emitting excess heat. Position the lights close enough to provide energy, yet far enough to prevent overheating, and aim for 12-16 hours of light per day.
Water and Hydroponic Nutrients for Microgreens
Your microgreens need a constant supply of water and a balanced nutrient solution. Use a nutrient-rich water solution, which typically includes essential elements like nitrogen, phosphorus, and potassium. Oxygenating the water is also important to prevent root diseases.
The pH level of your water-nutrient solution should be monitored and adjusted to the optimal range for microgreens, usually between 5.5 and 6.5. Proper pH balance and conductivity ensures nutrient availability and uptake by the microgreens, leading to healthy growth.
Planting and Germination
In hydroponic microgreen cultivation, precise seed sowing, moisture management, and temperature regulation are critical for successful germination. Let’s walk through the necessary steps to ensure your microgreens flourish from the start.
Sowing the Seeds
To begin, select the appropriate hydroponic system for your microgreens. Spread the seeds evenly across the growing tray ensuring that there’s minimal overlap. Consider the seed size when deciding how densely to sow; smaller seeds can be sown more densely than larger seeds. After distributing the seeds, lightly mist them with a spray bottle. Avoid submerging the seeds, as it can lead to overly wet conditions that might negatively affect germination.
Managing Moisture and Temperature
Your seeds need consistent moisture, so using a spray bottle, lightly water them 2-3 times a day. The goal is to keep the seeds damp but not swimming in water. Temperature is equally important: ideally, maintain an environment between 65-75°F (18-24°C) to support seed germination. Be mindful of air circulation as well—you want to prevent the buildup of excessive humidity that could encourage mold growth. Humidity levels should ideally be between 40-60%.
Germination Process
The germination process involves a delicate balance of care and observation. Typically, seeds will germinate within 2-7 days after sowing, depending on the plant variety. Once signs of sprouting appear, reduce the frequency of watering to prevent disease and avoid disturbing the delicate seedlings. During this stage of sprouting microgreens without soil, it’s crucial to monitor the system closely and adjust conditions as necessary to ensure successful growth into healthy, hearty microgreens.
How to Harvest Hydroponic Microgreens and Store Them
Harvesting your hydroponic microgreens at the right time ensures optimal flavor and nutritional value, while proper post-harvest handling maintains freshness and extends shelf life.
When to Harvest Microgreens
The ideal harvest time for your microgreens is when they have sprouted their first true leaves, typically 7 to 14 days after planting. This is when they are at peak nutrition and flavor. Waiting beyond this stage could lead to tougher textures and a decline in nutritional quality.
Harvesting Techniques
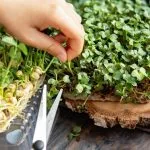
You’ll use clean and sharp scissors or a knife to cut the microgreens just above the water level or growth medium. Since hydroponic microgreens grow without soil, you bypass the risk of soil-borne contamination, making the process cleaner and often simpler.
- Gather your tools: scissors or a knife
- Sanitize your tools before use
- Cut just above the medium to keep the stems clean
Post-Harvest Handling and Storage
After harvesting, hydroponic microgreens usually don’t need washing, which is a benefit in terms of convenience and food safety. Store the freshly harvested microgreens in a container in your refrigerator to maintain freshness. They should be kept at a cool temperature, ideally between 2 to 4 degrees Celsius.
- Store in a breathable container
- Maintain a cool temperature (2-4°C)
- Use within a week for best results
Ensuring proper handling and storage after harvest will maximize the yield from your hydroponic setup, reducing waste and enhancing your dining experience with fresh flavors and a boost of nutrition.
Advanced Tips for Optimal Yields
To ensure the highest yields in your hydroponic microgreen garden, it’s crucial to hone advanced techniques. By refining your methods, you can boost both the growth rate and flavor of your microgreens.
Experimenting with Different Varieties
Experiment with a diverse array of microgreens to find out which varieties perform best in your hydroponic system. Radishes, kale, arugula, and broccoli are known for their rapid growth and high yields. Herbs like basil and cilantro, along with kohlrabi and sunflower, might take longer to mature but can provide unique flavors and nutritional benefits.
Scaling Up Your Hydroponic Garden
When you’re ready to increase production, carefully plan the expansion of your hydroponic garden. A systematic approach helps in maintaining quality while boosting yield. Larger systems may require more complex setups but can be more space and cost-efficient in the long run.
Maximizing Flavor and Growth
To enhance the taste profiles and accelerate growth:
- Adjust nutrient solutions based on specific plant needs.
- Offer optimal lighting for the variety you’re growing.
- Maintain temperature and humidity levels ideal for your microgreens.
Most Profitable Microgreens to Grow Hydroponically
Are microgreens worth growing for profit? Yes, if you focus on high-demand varieties like radishes, basil, and mustard. Their fast growth cycle and popularity in culinary use can maximize your return on investment. Start with your desired microgreens profit per tray and work from there.
Fine-Tuning Environmental Conditions
Controlling your growing environment is crucial for high-yield hydroponics:
- Use a consistent light source, mimicking the full spectrum of sunlight.
- Keep a tight schedule to expose plants to light at the right times for optimal growth.
- Monitor temperatures closely, as even slight fluctuations can impact plant health and yield.
Frequently Asked Questions
Exploring the world of hydroponic microgreens can be exciting, and you likely have a few questions. This section aims to address some common inquiries to help you succeed in growing these nutritious plants.

