In the world of vertical farming and urban gardening, hydroponic systems have emerged as a game-changer. They allow us to grow plants without soil, implying fewer pests and diseases, but that doesn’t mean they are maintenance-free. On the contrary, knowing how to clean your hydroponic system is critical for ensuring its longevity and maximizing plant growth.
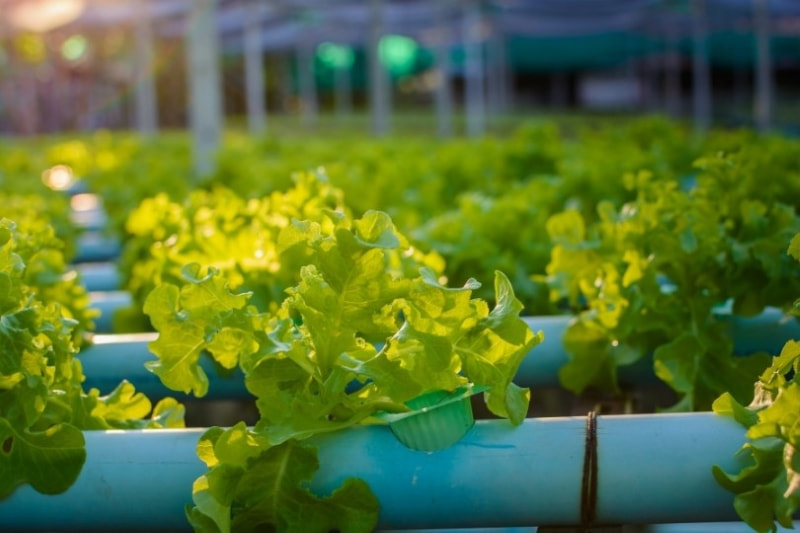
Learning how to take care of a hydroponics system may seem daunting at first glance. Yet, it’s not as complicated as it appears. It is an integral part of the process that – when done correctly – can significantly enhance the overall productivity of your system. So let’s roll up our sleeves and delve into this essential aspect of hydroponic gardening.
- Importance of Cleaning a Hydroponic System
- Necessary Equipment and Disinfecting Tools for Cleaning
- Preparing Your Work Area, Safety Measures and Precautions
- Removing Plants
- Draining and Flushing the System
- Disassembling Components
- Cleaning the Reservoir
- Cleaning Grow Room Surfaces and Grow Trays
- Cleaning Pipes and Pumps
- Sanitizing the Growing Medium
- How To Clean Salt Build Up In Hydroponics
- Cleaning Air Stones with Hydrogen Peroxide or Vinegar
- Sterilizing the Water Supply
- Reassembling Your Cleaned System
- Establishing a Regular Maintenance and Cleaning Schedule
- FAQs
Importance of Cleaning a Hydroponic System
Maintaining cleanliness in your hydroponic system is vital for ensuring the health and productivity of your plants. A clean environment helps to minimize the risks associated with disease, pests, and nutrient imbalances that can negatively impact your crops. It also facilitates an optimal growing environment, allowing your plants to flourish.
Algae, nutrient build-up, and root debris can create significant issues for your hydroponic system. When left unchecked, these contaminants can cause imbalances in your nutrient solution, competing with your plants for resources. Algae can also reduce oxygen levels in the system, stressing your plants and making them more susceptible to diseases. Nutrient build-up may lead to salt toxicity, causing your plants to suffer and potentially die. Finally, root debris can clog your pumps, drippers, or other essential components, disrupting the flow of nutrients to your plants.
Related: Preventing algae in hydroponics is important. Learn how to here.
Neglecting the cleanliness of your hydroponic system can lead to a variety of negative consequences. Clogged pumps, for example, can create circulation issues, preventing your plants from getting the nutrients they need to grow and thrive. Diseases and pests can quickly spread within an unclean hydroponic environment, causing extensive damage to your crops and possibly contaminating nearby plants. Furthermore, an untidy system may be less efficient, leading to higher costs and wasted resources.
To maintain a healthy hydroponic system, it’s essential to prioritize cleanliness and routinely clean all components, including reservoirs, pumps, tubing, and growing media. This will ensure a smooth-running system with an ideal environment for your plants to grow and prosper. So, always be attentive to your system’s cleanliness and take the necessary steps to keep it in top shape, ensuring the success of your hydroponic endeavors.
Necessary Equipment and Disinfecting Tools for Cleaning
To effectively clean your hydroponic system and prevent the growth of harmful microorganisms, it’s essential to gather the right equipment and disinfecting tools. Here’s a list of items you’ll need to get started:
- Sponges and scrub pads: These help you effectively clean various surfaces in your system without causing damage.
- Scrubbing brushes: Stiff brushes help you remove stubborn grime dirt from your hydroponic equipment.
- Isopropyl alcohol (70-100%): This is useful for disinfecting surfaces and removing any residue.
- Hydrogen peroxide (diluted to 3%): A non-toxic alternative to bleach, hydrogen peroxide acts as a disinfectant and can help battle mold, bacteria, and fungal spores.
- Vinegar: It’s a natural cleaning alternative that helps break down mineral deposits and disinfect surfaces.
- All-purpose cleaner: A gentle cleaner suitable for wiping down surfaces without causing harm to your plants.
- Small brush or toothbrush: These help you clean difficult-to-reach areas, like small crevices and tubing.
- 5-gallon bucket: A bucket will be useful for mixing your cleaning solutions and rinsing off your equipment.
- Sponge scrub brush: This comes in handy for cleaning reusable substrate and other delicate materials.
- Large tray: A tray can be utilized to hold reusable substrate during the cleaning process.
- Soft lint-free rags: These are useful for drying your equipment after cleaning and preventing the spread of contaminants.
- Rubber gloves: Wearing clean gloves during the cleaning process helps minimize contamination risks.
Preparing Your Work Area, Safety Measures and Precautions
Before you start cleaning your hydroponic system, it’s crucial to prepare your work area to ensure safety and efficiency. First, clear any clutter and debris from the area where you will be working, creating a clean and organized workspace. Make sure that all electrical devices are switched off and unplugged. This will not only protect them from potential water damage but also greatly reduce the risk of accidents.
It’s essential to prioritize your safety when handling cleaning solutions. Always wear appropriate protective gear, such as gloves and goggles, to avoid direct contact with chemicals, which can cause irritation or even burns on your skin and eyes. Additionally, consider wearing a mask or respirator if you’re using strong cleaning agents that emit fumes.
Work in a well-ventilated area to avoid inhaling any harsh chemicals or fumes. If you don’t have proper ventilation in your workspace, consider working outdoors or using fans to increase air circulation. Moreover, keep all cleaning supplies and tools within reach to make your process more efficient and effortless.
While working with your hydroponic system, always practice good hygiene. Make sure to regularly wash your hands, especially after touching any dirty or contaminated surfaces. This basic precaution can greatly reduce the risk of bringing harmful organisms or pathogens into your clean system.
Lastly, when disposing of used cleaning solutions or waste materials, make sure you follow local regulations and eco-friendly practices. By doing this, you’ll not only maintain a safe work environment for yourself but also contribute to the well-being of the planet.
Now that your work area is prepared and safety measures are in place, you can start cleaning your hydroponic system with confidence.
Removing Plants
Before cleaning your hydroponic system, it’s important to carefully remove all plants and disassemble the necessary components. This process can seem daunting, but with a few helpful tips, you can ensure a smooth and organized transition.
First, gently remove the plants from the system. If possible, relocate them to a temporary space where they can continue receiving light and nutrients. Be careful not to damage their roots during the process, as this might cause unnecessary stress and negatively affect their growth. If a plant is nearing the end of its life cycle, you can consider harvesting it instead.
Draining and Flushing the System
Before you begin the cleaning process, it is essential to properly drain and flush your hydroponic system. This ensures that you remove any leftover nutrient buildup and undesirable particles lingering in the water.
To start draining your hydroponic system, follow these simple steps:
- Disconnect the system from any power sources to prevent accidents.
- Locate the drainage valve in your reservoir. If your system doesn’t have a designated drainage valve, consider adding one for future ease of draining.
- Carefully open the valve and drain the old water into a bucket or directly into a drain. Make sure you have a large enough container to hold all the water in your reservoir.
- If necessary, consider using a wet/dry vacuum or a siphon to remove any remaining water from hard-to-reach areas of the system.
How To Flush Hydroponic Plants
After draining the system, it’s time to give it a thorough flush. Flushing eliminates any residual nutrients or debris that may be lurking in the system’s pipes, hoses, and other components.
- Fill your reservoir with clean water. It may be beneficial to incorporate a mild cleaning solution to help break down any remaining buildup, but be sure to use one that’s safe for hydroponic systems.
- Turn on your system and let the clean water flow through all components for 10-15 minutes. This will allow the water to reach all areas of the system and help break down any remaining nutrients or debris.
- Drain the system once again, following the same steps as before.
Repeat the flushing process as needed until the water removed from the system is clear, and all visible debris has been eliminated. By taking the time to properly drain and flush your hydroponic system, you’re ensuring a clean and healthy environment for your plants to thrive.
How Often Should I Flush My Hydroponic System?
The frequency of flushing your hydroponic system depends on a few factors such as the type of system, the kind of plants you’re growing, and overall plant health. However, as a general rule:
- For recirculating systems like Deep Water Culture (DWC) or Nutrient Film Technique (NFT), it’s a good practice to flush every 2 weeks to ensure optimal nutrient availability and prevent the buildup of salts and other waste products.
- In non-recirculating (drain-to-waste) systems, some growers prefer to flush their system with every nutrient change which can be approximately once per week.
If your plants appear healthy and are showing no signs of nutrient deficiencies or toxicities, this schedule can be adjusted based on empirical observation. Always remember that before re-introducing nutrients after a flush, you should balance the pH of your water.
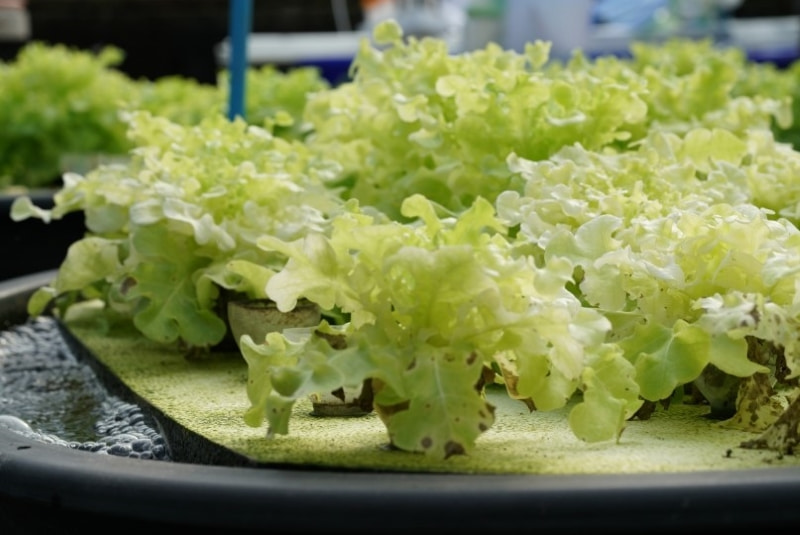
Flushing is also typically done at the end of a growing cycle just before harvest. This process is often referred to as “final flush” and is thought to improve the taste and quality of the final product by removing any excess nutrients from within the plant tissue.
Related: There are other reasons to change hydroponic water on a regular basis. Read about them here.
Disassembling Components
Next, gather the tools you’ll need for disassembling the various components of your hydroponic system. These may include a bucket, screwdriver, wrench, and a set of rubber gloves to keep your hands clean and protected. Make sure to have these items readily available to make the process as efficient as possible.
Begin by disconnecting any electrical components, such as water pumps and air stones, from the power supply. Then, drain the reservoir, making sure to dispose of the nutrient solution in an environmentally friendly manner. Once empty, you can proceed to disassemble the reservoir, pumps, and grow trays. Carefully take apart each piece, paying close attention to the small components to avoid losing them during disassembly.
As you disassemble each part of the hydroponic system, it’s a good idea to keep track of the components by laying them out in an organized manner or placing them in labeled containers. This will make it much easier to reassemble the system once it’s clean, ensuring no parts are lost or misplaced.
With everything properly disassembled, you’re now ready to move on to the actual cleaning process.
Cleaning the Reservoir
A crucial aspect of maintaining a healthy hydroponic system is making sure your reservoir is clean.
First, you should empty the reservoir of any water or nutrient solution. After you have removed all the liquid, use a bucket or container to catch any remaining drips or residue.
Next, prepare a safe and non-toxic cleaning solution suitable for hydroponic reservoirs. A mixture of warm water and mild dish soap should suffice for regular cleaning. However, you may want to consider using a sterilization solution if there has been an issue with bacteria or other contaminants.
With your cleaning solution ready, it’s time to give your reservoir a thorough scrub. Use a scrub brush or an old toothbrush to get into all the nooks and crannies of the reservoir. Don’t forget to pay particular attention to the hard-to-reach areas where bacteria may be hiding.
Once you have scrubbed every inch of the reservoir, rinse it well with clean water to ensure there is no soap or chemical residue left behind. It’s crucial that your reservoir is free of any harmful substances that could impact the health of your plants.
Additionally, always remember to check and clean the filters in your reservoir regularly. These filters help keep your water clean and ensure proper circulation. By taking care of them, you will extend the life of your hydroponic system and improve overall performance.
Finally, practice proper safety measures when handling cleaning solutions and chemicals. Wear gloves and eye protection if needed, and always follow the manufacturer’s instructions for handling and mixing any cleaning agents.
Cleaning Grow Room Surfaces and Grow Trays
Maintaining a clean grow room is essential for the health and productivity of your hydroponic system. It prevents the spread of diseases, pests, and bacteria that might hinder the growth of your plants.
It’s critical to clean your grow room’s surfaces, including tables, walls, and fixtures. Begin by sweeping the floor, clearing any dirt or debris that may have accumulated from the previous grow. Using a wet mop with an appropriate cleaning solution, sanitize the floor thoroughly. Remember to wipe down the tables, walls, and other surfaces with a clean cloth or sponge dampened with your chosen cleaning agent. This routine helps keep the environment clean, minimizing the risk of contamination.
Now, let’s focus on cleaning grow trays, which often attract algae, mineral deposits, and root debris. First, remove any remaining growing medium, roots, or plant debris by hand or with a soft brush. Rinse the tray under running water to clear away leftover dirt and grime.
For those stubborn deposits or algae, a non-abrasive pad or brush works wonders. Carefully scrub the grow tray’s surfaces, corners, and drainage holes, ensuring you don’t cause any damage to the delicate material. After scrubbing, rinse the tray again with clean water.
Periodically, it’s important to sanitize the grow trays using hydrogen peroxide or another suitable disinfectant. H2O2 is also great for keeping hydroponic water clean. This proactive measure will eliminate any lurking pathogens or microorganisms that may pose a risk to your plants. To do this, mix a solution of your chosen disinfectant and water, and follow the product’s instructions to ensure proper dilution. Submerge or spray the grow trays in the solution and allow them to soak for the recommended time before rinsing thoroughly with clean water.
Cleaning Pipes and Pumps
Cleaning the pipes and pumps is an essential part of maintaining your hydroponic system. In order to ensure proper function and avoid potential damage, take these steps to clean those areas.
First, disconnect any pipes or hoses from your pumps, making sure to turn off any electrical connections before you begin working. Empty the pipes by holding them vertically and shaking out any remaining water or nutrients.
For cleaning the pipes, prepare a solution of equal parts water and white vinegar. Fill the pipes with this mixture and let them sit for at least 30 minutes. By cleaning the hydroponic system with vinegar you’ll break down any mineral deposits or algae buildup. Afterward, thoroughly rinse the pipes with fresh water.
For the pumps, remove any visible debris from the exterior and around the intake area using a soft brush. Next, disassemble the pump according to manufacturer instructions and carefully clean the impeller and surrounding components. Use a mixture of 3% food-grade hydrogen peroxide and water to clean and disinfect these parts. Make sure to rinse them well with fresh water afterward.
While cleaning, inspect all pump components for signs of wear or damage, such as cracks or worn impeller blades. Replace any faulty parts to prevent further issues with your hydroponic system.
Before reassembling your pump, don’t forget to lubricate any moving parts as necessary, using the manufacturer’s recommended lubricant. This will ensure optimal functionality and a longer pump lifespan.
Now that your pipes and pumps are clean, reattach and reconnect everything to your hydroponic system.
cleaning air stones with hydrogen peroxide or vinegar
Sanitizing the Growing Medium
A key stage in cleaning your hydroponic system is sanitizing the growing medium, which is where your plants grow. The growing medium can harbor bacteria, fungi, and other harmful organisms that can jeopardize your plant’s health if not dealt with properly.
Step-by-Step Procedure
- Removal: Start by carefully removing the plants and any plant debris from their growing medium. This could include dead roots, leaves, or other organic material that may harbor pests or diseases. Be gentle to avoid causing any unnecessary stress or damage to your plants.
- Sanitization: Submerge the growing medium in a solution of 1 part bleach to 10 parts water for about half an hour. This will help eliminate any leftover bacteria, fungi, or pathogens that might harm your plants’ growth or health. Another good solution is hydrogen peroxide and water. A good ratio is 1 part 3% hydrogen peroxide to 9 parts water.
- Rinsing Again: After soaking in the bleach or H2O2 solution, thoroughly rinse the growing medium with clean water again to ensure all bleach residues are completely removed.
- Drying: Let the sanitized media dry completely before replanting anything in it. The drying process helps to further eliminate any microorganisms that may have survived so far.
- Sterilization with Heat (optional): For an extra level of sanitation, if possible, bake your growing medium at 180-200°F (82-93°C) for about 30 minutes to ensure all potential harmful organisms are killed off.
- Replanting: Once fully dried, you can safely replant your plants back into the sanitized medium without worrying about disease or infection threatening their growth and development.
Note: Not all types of hydroponic growing mediums can be sanitized and reused as some may degrade or lose their effectiveness over time
How To Clean Salt Build Up In Hydroponics
To properly clean salt buildup in a hydroponic system:
- First, empty the reservoir and dispose of the nutrient solution.
- Prepare a cleaning solution using non-chlorinated water and a mild cleaner like hydrogen peroxide or natural vinegar.
- Circulate this mixture through your entire system for about an hour to dissolve accumulated salts.
- Afterward, thoroughly rinse the entire system with clean, non-chlorinated water to remove any residual cleaner and dissolved salts.
- Finally, refill your reservoir with fresh nutrient solution.
Cleaning Air Stones with Hydrogen Peroxide or Vinegar
Both hydrogen peroxide and vinegar can be used to clean hydroponic air stones, though the methods differ slightly. The aim is to remove mineral buildup and bacteria that can impede the performance of your air stone.
- Remove the air stone from the system: Unplug it from any power source first, then carefully pull out the air stone.
- Soak in hydrogen peroxide OR white vinegar: Place the air stone in a container and cover it completely with either a 3% hydrogen peroxide solution OR equal parts of white vinegar and water. Let it soak for about 15-20 minutes if it’s H2O2 or an hour or more if it’s vinegar. You should see loosened debris or the bubbling should stop.
- Scrub off residue: After soaking, use an old toothbrush or other small brush to scrub off any visible residue.
- Rinse thoroughly: Rinse the air stone in running water to make sure all of the hydrogen peroxide or vinegar is removed, as over time, they can degrade some types of materials used in certain air stones.
- Dry before reinstallation: Leave your air stones out to dry completely before reinstalling them into your system.
Remember safety precautions: wear gloves when handling these chemicals even though they’re household products – both hydrogen peroxide and vinegar can cause skin irritation on prolonged contact.
Also note that while this cleaning process will help improve airflow, heavily clogged or old airstones may need replacement instead.
Sterilizing the Water Supply
The first step in maintaining a clean hydroponic system is sterilizing your water supply. This process involves treating the water to remove potentially harmful substances, such as heavy metals, algae, and bacteria. The importance of this step cannot be overstated, as it helps ensure the health of your plants and longevity of your hydroponic system. Does hydroponics need constant water? Yes, it does, but ensure that the water is always clean.
Next on our list is removing algae and fungi from your system. Algae and fungi can compete with plants for nutrients and sunlight, which can stunt growth or even kill the plant. Regular cleaning of all parts of your system along with careful monitoring can effectively control the growth of these organisms.
Another essential part of cleaning your hydroponic system involves changing and monitoring nutrients on a regular basis. Nutrients are what fuel your plant’s growth, so they should be checked often to ensure optimal levels are maintained. Over time, these nutrients get depleted or imbalanced, therefore requiring you to change them out for fresh ones.
Lastly, pest and disease control is critical in maintaining a healthy hydroponic environment. Pests or diseases can quickly spread throughout a closed-loop system like hydroponics if not kept in check. Regular inspection for signs of pests or disease will allow you to address any problems before they become severe.
Reassembling Your Cleaned System
Keeping your hydroponic water clean goes hand in hand with regular system maintenance. This includes a careful reassembly of the entire hydroponic setup. Let’s guide you through this phase in an easy-to-follow process.
Step-by-Step Guide to Reassembling Your Hydroponics Setup
After all components have been cleaned and dried, it’s time to start rebuilding your hydroponic system. Start by referring back to the manufacturer’s instructions or your initial setup guide. This will ensure each part is returned to its correct location.
- Begin by placing the reservoir at its designated spot.
- Fit the pump inside the reservoir, ensuring it’s correctly attached.
- Connect the tubing from the pump to the growing trays or pots.
- Install the air stones and connect them to your air pump using air lines.
- Place net pots back in their spots filled with cleaned or new grow mediums.
Importance of Checking All Connections and Fittings
Reassembling any hydroponic system should be done carefully with due diligence paid to all connections and fittings. A small leak can lead to nutrient solution loss causing harm not only to your plants but also potentially leading to a mess that could damage other property too.
- Ensure that all tubes are tightly connected on both ends.
- Check if all seals are properly seated.
- Examine connectors for any signs of wear or damage; replace if needed.
By following these steps you can mitigate potential problems down the line, saving time, resources and preventing unnecessary stress for your plants.
Waiting Period Post-Reassembly
Once you’ve reassembled everything and double-checked for any potential leaks or issues, fill up your reservoir with clean water (preferably distilled) without adding any nutrients yet.
Letting this clean water run through your system allows you to flush out any remaining residues from previous plantings or cleaning agents that could still be present in some parts of the system like tubes, sprayers or drippers.
Typically a 24-hour period should suffice but depending on how extensive your system is or how intense was prior contamination – more time might be required before reintroducing plants into it again.
Establishing a Regular Maintenance and Cleaning Schedule
One of the fundamental aspects of keeping hydroponic water clean is establishing a regular maintenance and cleaning schedule. A well-structured routine helps in ensuring that your hydroponic system operates efficiently and optimally, resulting in healthier plant growth. Consistent maintenance not only helps detect potential issues early but also prevents complications from arising due to neglect.
Importance of a Regular Maintenance Schedule
A regular maintenance schedule ensures that all components of your system are functioning correctly, allowing you to address any problems before they escalate. This includes monitoring the various parameters such as pH, nutrient concentration (EC), and water temperature. Get a good EC meter combined with a pH meter and temperature gaugeWhat is the Best pH Meter for Hydroponics in 2025? to measure these. You should also observe for signs of pests, diseases, or other anomalies.
How often to clean a hydroponic system largely depends on your specific setup and plants’ needs. However, it’s generally recommended to fully change the nutrient solution every 1-2 weeks while partial changes or top-offs could be done more frequently depending on evaporation rates or plant consumption levels.
How to Clean Your Hydroponic System: Key Tasks
There are several tasks that you should perform regularly to maintain optimal conditions within your hydroponics setup. These tasks can be divided into weekly, monthly, and seasonal routines.
Weekly tasks typically include monitoring pH levels, checking EC readings to ensure correct nutrient concentrations are maintained consistently for optimal plant uptake. You may need to adjust these parameters throughout this period according to your plant’s needs.
Monthly tasks mainly involve thorough checks for components’ functionality like pumps or air stones; looking out for any signs of wear or damage that could impede their performance. Additionally, this is an excellent time for full system flushes – completely replacing your nutrient solution with fresh water and nutrients after proper reservoir cleaning.
Seasonal tasks might include comprehensive deep cleans of the entire system such as during crop rotation periods when switching between different types of plants or simply at season end. This process keeps algae build-up under control and eliminates any potential pathogen accumulation ensuring clean start-up conditions for subsequent crops.
Keeping track of all these activities might seem daunting initially but using a journal or digital planner can simplify this task significantly providing easy reference whenever needed later on. By diligently noting down each maintenance activity along with observations about plant health or growth progress – you create valuable resources helping fine-tune future cultivation strategies based on past experiences thus promising better yields over time.

